Water can ruin your balcony fast. Leaks, mold, and structural damage sneak in without proper protection. A soggy balcony isn’t just an eyesore—it’s a costly problem. According to the U.S. Department of Housing and Urban Development, water damage repairs can cost homeowners $1,000 to $5,000 or more, depending on severity. Balcony waterproofing stops these issues before they start. You don’t need a big budget to keep your outdoor space safe and dry. This guide shares affordable steps to waterproof your balcony effectively. From simple DIY fixes to cost-effective products, you’ll learn how to protect your balcony without breaking the bank.
Balcony Waterproofing Basics
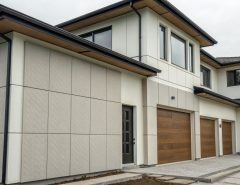
Balcony waterproofing creates a barrier to block water from seeping into your building. Rain, humidity, and temperature changes hit balconies hard. Without protection, water causes wood rot, concrete cracks, or rust in metal structures. The goal is to stop water infiltration while keeping your balcony functional and attractive.
Waterproofing doesn’t have to be expensive. Many solutions use affordable materials like sealants, membranes, or coatings. The key is choosing the right approach for your balcony’s material—whether it’s concrete, wood, or composite. Let’s explore cheap, practical steps to waterproof your balcony and prevent water damage.
Step-by-Step Guide to Cheap Balcony Waterproofing
Step 1: Assess Your Balcony’s Condition
Start by checking your balcony for damage. Look for cracks, peeling paint, or water pooling. These signs show where water might sneak in. A quick inspection helps you plan your waterproofing approach.
- Check the surface: Examine tiles, wood, or concrete for cracks or wear.
- Look for leaks: Spot stains or dampness on walls or ceilings below.
- Test drainage: Ensure water flows off the balcony, not pools.
- Inspect railings: Check for rust or loose seals around posts.
Fix small issues like cracks with a polyurethane caulk. It’s cheap, about $5–$10 per tube, and seals gaps effectively. For bigger damage, consult a professional to avoid costly repairs later.
Step 2: Clean and Prep the Surface
A clean surface ensures waterproofing products stick properly. Dirt, mold, or old paint can weaken your seal. Spend time prepping to save money on future fixes.
- Sweep debris: Remove leaves, dirt, and grime with a broom.
- Wash the surface: Use a mild detergent and water to scrub the balcony.
- Remove mold: Apply a vinegar solution to kill mildew and let it dry.
- Sand rough spots: Smooth out uneven areas for better adhesion.
Let the balcony dry completely. A dry surface helps coatings and membranes bond tightly, creating a strong waterproof barrier.
Step 3: Choose Affordable Waterproofing Products
You don’t need pricey systems like the Westcoat waterproofing system to protect your balcony. Many budget-friendly options work well. Here are some cost-effective choices:
- Liquid waterproofing membranes: Products like USG DUROCK Liquid Waterproofing Membrane ($50 per gallon) create a flexible, seamless barrier. Apply with a roller or brush for easy coverage.
- Polyurethane sealants: These cost $5–$15 and fill cracks or joints. They’re ideal for small balconies or quick fixes.
- Waterproof paint: Latex-based waterproof primers ($20–$30 per gallon) protect walls and surfaces from moisture.
- Sheet membranes: PVC or rubber sheets, like TW-60 Sheet Waterproofing Membrane, cost $1–$2 per square foot. They’re durable and easy to install under tiles.
Compare products based on your balcony’s material. For concrete slabs, liquid membranes work best. For wooden balconies, sealants and treated wood are effective. Always check for UV protection to resist sun damage.
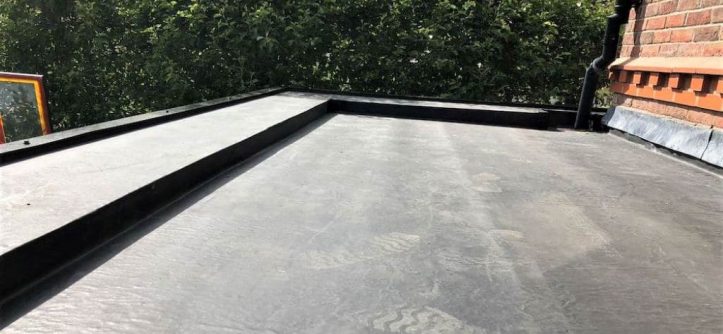
Step 4: Apply a Waterproofing Membrane
A waterproofing membrane is your balcony’s main defense against water intrusion. Liquid or sheet membranes are affordable and DIY-friendly. Here’s how to apply them:
- Choose your membrane: Pick a liquid or sheet membrane based on your budget and balcony type.
- Apply primer: Use a product like TWP-1 Quick Dry Primer ($15–$20) to help the membrane stick.
- Spread the membrane: For liquid membranes, roll or brush evenly across the surface. For sheet membranes, cut to size and press down firmly.
- Seal edges: Use TWM-1 Mastic ($10–$15) to secure edges and prevent leaks.
- Let it cure: Follow the product’s instructions—usually 24–48 hours—to ensure a solid bond.
Membranes like the ALX waterproofing system or MACoat waterproofing system are pricier but effective for larger balconies. For small spaces, cheaper options like clear waterproofing membranes work just as well.
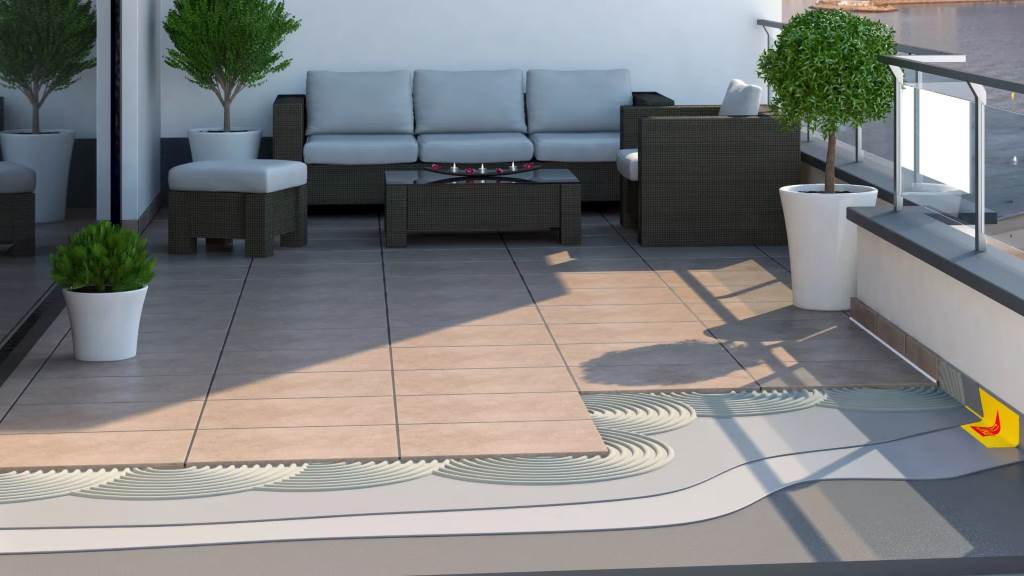
Step 5: Install Waterproof Flooring
Waterproof flooring adds an extra layer of protection. You can tile over a waterproof membrane or use other budget-friendly options. Here are some choices:
- Waterproof peel-and-stick tiles: These cost $1–$3 per square foot and are easy to install.
- Vinyl flooring: Durable and water-resistant, vinyl costs $2–$5 per square foot.
- Treated wood: Sealed wood planks cost $3–$6 per square foot and suit wooden balconies.
- Concrete coatings: Cementitious waterproofing, like waterproof silica cement, costs $20–$30 per gallon and protects concrete slabs.
Ensure the flooring slopes slightly (at least 2% or 1/4 inch per foot) to direct water away. This prevents water pooling and extends your balcony’s life.
Step 6: Seal Walls, Doors, and Windows
Water can sneak in through walls, doors, or windows. Use affordable sealants to block these entry points.
- Walls: Apply a waterproof primer or paint-on waterproofing membrane ($20–$30 per gallon). These resist UV rays and temperature changes.
- Doors and windows: Use weather stripping or door sweeps ($5–$10) to seal gaps. Window flashing ($10–$15) prevents leaks around frames.
- Railings: Apply rubberized bitumen mastic ($10–$15) around railing bases to stop water seepage.
These steps protect your balcony and the rooms below from leaks and framing damage.
Step 7: Add Drainage Solutions
Good drainage keeps water from pooling. Check your balcony’s slope and drainage system. If water collects, add these cheap fixes:
- Install a drain: Small balcony drains cost $10–$20 and direct water away.
- Angle an awning: A waterproof awning ($50–$100) channels rain off the balcony.
- Use balcony mats: Waterproof rugs or mats ($20–$50) reduce water contact with the floor.
Proper drainage reduces the risk of water damage and mold growth.
Step 8: Maintain Your Waterproofing
Regular upkeep keeps your balcony waterproof and saves money long-term. Follow these tips:
- Inspect yearly: Check for cracks, peeling, or wear in the membrane or sealant.
- Clean regularly: Sweep debris and wash surfaces to prevent mold.
- Reapply sealant: Refresh caulk or sealant every 2–3 years for $10–$20.
- Monitor drainage: Clear drains to ensure water flows freely.
Maintenance prevents costly repairs and keeps your balcony in top shape.
Explore Now:
7 Building Supplies and its Uses
Budget-Friendly Waterproofing Products to Consider
Here’s a quick list of affordable products for balcony waterproofing:
- USG DUROCK Liquid Waterproofing Membrane: $50 per gallon, great for concrete.
- TW-60 Sheet Waterproofing Membrane: $1–$2 per square foot, ideal for tiles.
- TWM-1 Mastic: $10–$15, seals membrane edges.
- TWP-2 Water-Based Primer: $15–$20, boosts adhesion.
- Drizoro Waterproofing Products: $30–$50, versatile for multiple surfaces.
- CMA SealTight: $25–$40, strong for outdoor areas.
- ClearCoat: $20–$35, clear finish for aesthetic appeal.
These products offer tear and abrasion resistance, UV protection, and durability without high costs.
Common Mistakes to Avoid
Waterproofing seems simple, but mistakes can lead to leaks or framing damage. Avoid these pitfalls:
- Skipping prep: Dirty or wet surfaces weaken adhesion.
- Ignoring slope: Flat balconies cause water pooling.
- Using cheap, low-quality products: They wear out fast, costing more later.
- Neglecting maintenance: Regular checks prevent big repairs.
- DIY without research: Follow product instructions to avoid errors.
Consult a licensed structural engineer for complex balconies to ensure compliance with modern building codes.
Why Cheap Waterproofing Still Works
Affordable waterproofing doesn’t mean low quality. Products like liquid waterproofing membranes or polymer-bitumen membranes offer strong protection at low costs. For example, a 100-square-foot balcony can be waterproofed for $100–$300 using DIY methods. Compare that to $1,000+ for professional systems like ALX or MACoat.
A case study from Fort Worth shows a homeowner waterproofed their 80-square-foot balcony for $150 using liquid membrane and sealant. Five years later, no leaks or damage appeared, proving budget solutions can last.
FAQs
What is the cheapest way to waterproof a balcony?
Use liquid waterproofing membranes or polyurethane sealants. They cost $20–$50 and are DIY-friendly.
Can I waterproof a balcony myself?
Yes, with proper prep and products like sheet membranes or sealants. Follow instructions carefully.
How long does balcony waterproofing last?
Quality waterproofing lasts 5–10 years with maintenance. Reapply sealants every 2–3 years.
What materials are best for balcony waterproofing?
Liquid membranes, sheet membranes, and polyurethane coatings work for concrete, wood, or composite balconies.
Do I need a professional for balcony waterproofing?
DIY works for small balconies. Hire a professional for large or damaged structures.
Keep Your Balcony Dry and Save Money
Waterproofing your balcony doesn’t need to cost a fortune. Assess your balcony, clean it well, and apply affordable products like liquid membranes or sealants. Add waterproof flooring and maintain it yearly to prevent water damage. These steps protect your outdoor area, maintain structural integrity, and save you from expensive repairs. Start your waterproofing project today—grab a sealant or membrane and make your balcony a dry, safe space!