A spongy deck feels soft or bouncy underfoot, signaling underlying issues like wood rot or structural weakness. This article guides you through identifying causes, inspecting damage, and repairing your deck. Whether you’re dealing with wood decks or composite decking, you’ll find actionable steps to restore stability. A spongy deck isn’t just uncomfortable—it can be unsafe. Let’s dive into fixing it with practical solutions.
What Causes a Spongy Deck?
A spongy deck often stems from moisture, poor maintenance, or structural issues. Understanding the cause helps you fix it effectively. Here are common culprits:
- Wood Rot: Moisture seeps into wood, causing decay. This weakens deck boards and joists.
- Water Damage: Poor drainage or lack of waterproof coating lets water pool, softening the deck surface.
- Insect Damage: Termites or carpenter ants eat away at wood, creating soft spots.
- Structural Issues: Weak support beams, improper joist spacing, or loose deck screws compromise stability.
- Aging Materials: Old pressure-treated pine or untreated wood deteriorates over time.
Inspect your deck to pinpoint the exact issue. Look for soft spots, discoloration, or creaking sounds.
How to Inspect Your Deck for Damage
Before fixing a spongy deck, assess the damage thoroughly. A careful inspection saves time and money. Follow these steps:
- Check for Soft Spots: Walk across the deck. Press down to feel for bouncy or weak areas.
- Use a Moisture Meter: Measure moisture levels in deck boards. High readings indicate water damage.
- Examine Support Beams and Joists: Look under the deck. Check for rot, cracks, or loose joist hangers.
- Inspect Deck Stairs and Railings: Ensure they’re secure. Sponginess can spread to these areas.
- Look for Insect Damage: Check for sawdust or tiny holes, signs of termites or ants.
- Test Ledger Board: Ensure the board connecting the deck to the house is secure.
Document your findings. Take photos to track damage and plan repairs.
Tools and Materials You’ll Need
Gather the right tools and materials for a successful repair. Here’s a list to get started:
- Tools: Screwdriver, hammer, pry bar, drill, moisture meter, nail set, pressure washer.
- Materials: Deck screws, galvanized nails, ring shank nails, joist tape, epoxy wood filler, polyurethane coating, waterproof membrane, wood cleaner.
- Optional: Composite decking, pressure-treated marine ply, floatation foam, fiberglass putty, West System epoxy resin.
Choose high-quality materials like stainless steel deck screws for durability. Avoid cheap fasteners that rust.
Step-by-Step Guide to Fixing a Spongy Deck
Follow these steps to restore your deck’s strength. Each step addresses common issues like wood rot or weak support posts.
Step 1: Clean the Deck Surface
Start with a clean deck to spot damage clearly. Use a wood cleaner and pressure washer. Apply the cleaner evenly. Rinse thoroughly to remove dirt and grime. Avoid high pressure to prevent damaging wood. Let the deck dry completely.
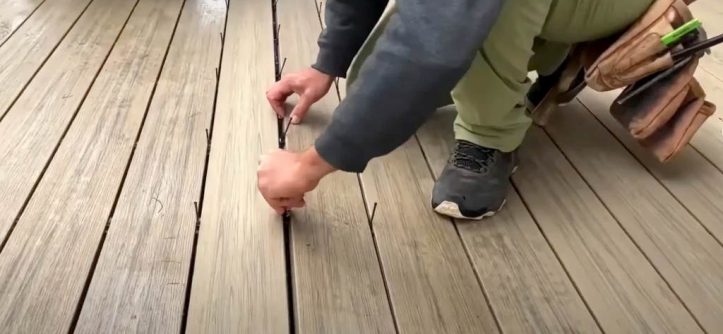
Step 2: Remove Damaged Deck Boards
Identify soft or rotten deck boards. Use a pry bar to lift them carefully. Remove nails or deck screws with a screwdriver or drill. Check the underlying joists for rot or damage. Replace any compromised joists with pressure-treated pine.
Step 3: Address Wood Rot and Core Voids
Wood rot often causes sponginess. Scrape away decayed wood with a putty knife. Fill small voids with epoxy wood filler or polyester resin. For larger voids, use fiberglass putty or West System epoxy. Apply in layers for strength. Sand smooth once cured.
Step 4: Reinforce Support Beams and Joists
Check support beams and joists for stability. Secure loose joist hangers with galvanized nails. Add joist tape to protect against moisture. Install metal post brackets for extra support. Ensure proper joist spacing (16 inches for most decks).
Step 5: Replace or Repair Deck Stairs
Spongy deck stairs pose safety risks. Inspect treads and risers for rot. Replace damaged stairs with pressure-treated marine ply or composite decking. Secure with carriage bolts for stability. Add a waterproof membrane for protection.
Step 6: Apply Waterproof Coating
Prevent future water damage with a waterproof coating. Choose a polyurethane coating or water-repellent sealer. Apply evenly with a brush or roller. Cover all deck surfaces, including seams. Reapply every 1–2 years for lasting protection.
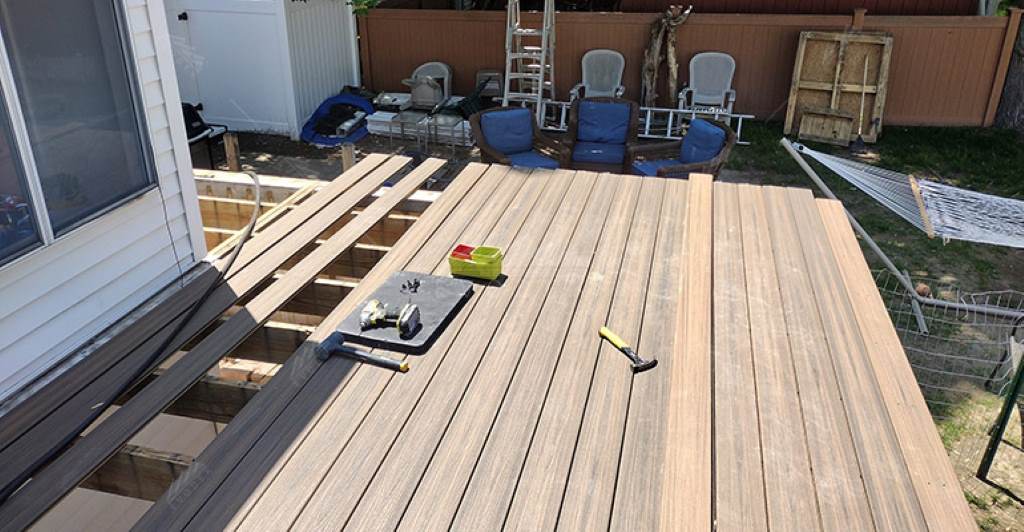
Step 7: Consider Composite Decking or PVC Decking
For a long-term solution, replace wood with composite decking or PVC decking. These materials resist moisture and insect damage. They require less maintenance than wood decks. Install using stainless steel deck screws for durability.
Step 8: Add Reinforcement Techniques
Strengthen your deck with reinforcement techniques. Use expanding spray foam or closed cell foam to fill core voids. Install support posts for heavy decks. Vacuum bagging can help bond fiberglass skins or laminate for extra strength.
Step 9: Finish with Deck Staining
Enhance curb appeal with deck staining. Choose a high-quality deck finish that resists seasonal changes. Apply after cleaning and repairs. Use a brush for even coverage. Let it dry for 24–48 hours.
Step 10: Regular Maintenance
Maintain your deck to prevent sponginess. Clean annually with a wood cleaner. Inspect for water damage during the rainy season. Tighten loose deck fittings. Reapply waterproof coating regularly. Address small issues before they worsen.
Advanced Repairs for Specific Cases
Some decks, like those on boats (e.g., Ericson 36 sailboat), require specialized fixes. Here’s how to handle unique challenges:
- Balsa Core Damage: Replace rotted balsa core with floatation foam or honeycomb material. Use West System epoxy for bonding.
- Fiberglass Skins: Repair spider cracking with fiberglass laminate or putty. Apply 3M 5200 for a strong seal.
- Transom Foam: Inject epoxy or moisture-cure foam into transom voids. Ensure proper center of gravity for stability.
- Fuel Tank Issues: Inspect for leaks near the deck. Seal with epoxy resin or Rhino Liner for durability.
Consult a professional for complex repairs like composite construction or vacuum bagging.
Safety Tips for Deck Repairs
Safety comes first during DIY projects. Follow these precautions:
- Wear gloves, goggles, and a mask when handling epoxy or chemicals.
- Use sturdy ladders for deck stairs or elevated areas.
- Secure tools to avoid tripping hazards.
- Check for electrical lines before drilling or cutting.
- Hire a deck builder for major structural issues.
How to Prevent a Spongy Deck in the Future
Prevention saves time and money. Adopt these habits to keep your deck firm:
- Apply a water-repellent sealer annually.
- Clean regularly with a wood cleaner.
- Inspect for insect damage or soft spots yearly.
- Ensure proper drainage to avoid water pooling.
- Use high-quality materials like stainless steel deck screws or joist tape.
Regular upkeep extends your deck’s life and enhances living space.
When to Call a Professional
Some issues require expert help. Contact a professional for:
- Severe structural issues or wood rot.
- Complex repairs like vacuum bagging or composite construction.
- Deck hatches or ledger board replacements.
- Signs of extensive insect damage or spider cracking.
Professionals ensure safe, long-lasting repairs.
Explore Also:
How to Repair a Burnt-Out Angle Grinder
Your Essential Guide to Hiring a Milwaukee Concrete Contractor
FAQs
How do I know if my deck is spongy?
Walk across the deck. Feel for soft or bouncy spots. Use a moisture meter to confirm water damage.
Can I fix a spongy deck myself?
Yes, for minor issues like soft spots or small rot areas. Use epoxy wood filler or joist tape. Hire professionals for structural issues.
What materials are best for deck repairs?
Use pressure-treated pine, composite decking, or PVC decking. Secure with stainless steel deck screws or galvanized nails.
How often should I maintain my deck?
Clean and inspect annually. Reapply waterproof coating every 1–2 years. Check for loose deck fittings or rot.
Can composite decking prevent a spongy deck?
Yes, composite decking resists moisture and insects. It’s a durable, low-maintenance option for long-term solutions.
Conclusion
A spongy deck signals trouble, but you can fix it with the right approach. Clean thoroughly, replace damaged boards, and reinforce weak areas. Use quality materials like composite decking or epoxy resin. Regular maintenance prevents future issues. Your deck can be safe, strong, and beautiful again. Share your deck repair tips in the comments below or contact a professional for expert help!