Spring-loaded blind brackets can be tricky to remove, especially for homeowners tackling their first window treatment project. Whether you’re updating your home decor or replacing damaged blinds, understanding the proper removal technique saves time and prevents damage. H Decor Ideas offers expert guidance for all your home improvement needs.
Many homeowners struggle with these brackets because they operate differently than traditional mounting systems. Spring-loaded mechanisms use tension to hold blinds securely in place. However, this same tension can make removal challenging without the right approach.
Learning how to remove window blinds properly ensures you avoid costly mistakes. The process requires patience and the correct technique to prevent wall damage or bracket breakage.
Understanding Spring-Loaded Blind Brackets
Spring-loaded brackets feature a unique design that uses internal springs to create holding pressure. These brackets typically have a front panel that pivots or slides to release the blind headrail. The spring mechanism keeps constant pressure on the headrail, securing it firmly against the back of the bracket.
Most spring-loaded systems include two types of brackets: fixed brackets and adjustable ones. Fixed brackets mount permanently to the wall or window frame. Adjustable brackets allow for minor positioning changes during installation.
The spring mechanism operates through compression or extension principles. When you insert the blind headrail, the spring compresses slightly, then expands to grip the rail securely. This design eliminates the need for screws or clips to hold the blinds in position.
Tools You’ll Need
Before starting the removal process, gather the necessary tools. Most spring-loaded bracket removals require minimal equipment, making this a manageable DIY project.
Essential tools include a flathead screwdriver for prying and adjusting. A small flashlight helps illuminate tight spaces around the brackets. Clean cloths protect surfaces from scratches during removal.
Optional tools that can be helpful include needle-nose pliers for gripping small components. A step ladder ensures safe access to high-mounted blinds. Having a helper can make the process easier, especially with heavy or wide blinds.
Step-by-Step Removal Process
Start by fully raising the blinds to their highest position. This step provides better access to the brackets and reduces the weight you’ll be handling. Secure the blind cord to prevent accidental lowering during removal.
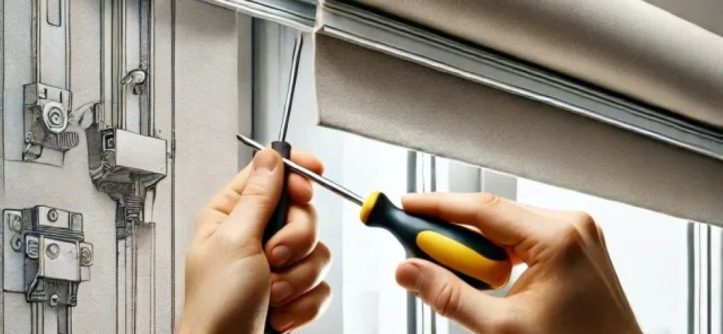
Locate the front panel or release mechanism on each bracket. Most spring-loaded brackets have a small tab, lever, or pivoting panel at the front. This component controls the spring tension that holds the headrail in place.
Gently press, pull, or rotate the release mechanism according to your bracket design. You should feel the spring tension decrease as the mechanism disengages. Some brackets require firm pressure, while others need only a light touch.
While maintaining pressure on the release mechanism, carefully lift the blind headrail up and forward. The rail should slide out of the bracket easily once the spring tension is released. If you encounter resistance, double-check that the release mechanism is fully engaged.
Removing Different Bracket Types
Front-loading brackets have a hinged or sliding front panel. Press the panel inward while lifting the headrail straight up. These brackets often make a slight clicking sound when properly released.
Top-loading brackets require lifting the headrail straight up after releasing the spring mechanism. The rail typically slides out through the top opening of the bracket. Be prepared to support the full weight of the blinds as they come free.
Side-loading brackets feature release tabs on the sides of the bracket housing. Squeeze both tabs simultaneously while sliding the headrail horizontally out of the bracket. This type requires coordinated movement to prevent binding.
Troubleshooting Common Issues
Stuck brackets often result from paint buildup or debris in the mechanism. Use a small brush or compressed air to clean around the release components. Gentle tapping with a screwdriver handle can help loosen stuck parts.
Broken release mechanisms require careful handling to avoid damage. If the tab or lever is damaged, try using needle-nose pliers to grip and operate the mechanism manually. Sometimes, gentle pressure from multiple angles will free a stuck component.
Painted-over brackets present special challenges. Use a utility knife to carefully score around the bracket edges, breaking any paint seal. Work slowly to avoid damaging the wall surface or bracket finish.
Safety Considerations
Always ensure you have stable footing when working with elevated blinds. Use a proper step ladder rather than chairs or other makeshift platforms. Having someone spot you adds an extra layer of safety.
Support the weight of the blinds throughout the removal process. Heavy blinds can fall suddenly when released from the brackets, potentially causing injury or damage. Keep your grip secure and your stance balanced.
Be mindful of sharp edges on both brackets and blind components. Metal brackets can have sharp corners or burrs that can cause cuts. Wear work gloves if you’re concerned about sharp edges.
Post-Removal Steps
Clean the bracket mounting area thoroughly after removal. Use a damp cloth to remove dust and debris that may have accumulated behind the blinds. This cleaning also helps you assess any wall damage that needs repair.
Inspect the brackets for reusability if you plan to reinstall blinds later. Check for bent components, stripped screws, or damaged spring mechanisms. Replace any damaged brackets before reinstallation.
Store removed brackets and hardware in a labeled container. Keep screws, brackets, and any small components together to prevent loss. Take photos of the original installation for future reference.
When to Call a Professional
Complex bracket systems or those mounted in difficult locations may require professional assistance. If you encounter brackets that don’t respond to standard removal techniques, professional help prevents damage.
Multiple bracket failures or consistent sticking issues might indicate underlying problems. A professional can assess whether the brackets are installed correctly or if wall conditions are causing the problems.
Valuable or delicate window treatments warrant professional handling. Custom blinds or expensive materials justify the cost of professional removal to prevent damage.
Maintenance Tips for Future Removals
Regular cleaning of bracket mechanisms prevents buildup that causes sticking. Use a small brush or compressed air monthly to keep release mechanisms functioning smoothly.
Lubricate moving parts annually with light machine oil or silicone spray. Apply lubricant sparingly to avoid attracting dirt and debris. Wipe excess lubricant to prevent dripping.
Check bracket tightness periodically, as vibration and settling can loosen mounting screws. Tighten loose screws promptly to prevent bracket failure or blind damage.
Conclusion
Removing spring-loaded blind brackets requires understanding their unique mechanism and following proper technique. The key steps include identifying the release mechanism, applying appropriate pressure, and supporting the blind weight during removal. With patience and the right approach, most homeowners can successfully complete this task without professional help.
Remember that different bracket types may require slightly different techniques, so take time to examine your specific brackets before beginning. Safety should always be your priority, especially when working at height or with heavy blinds.
Proper removal technique protects both your blinds and your walls from damage, ensuring a successful project outcome. Keep these guidelines handy for future blind maintenance or replacement projects.
Frequently Asked Questions
Q: How do I know if my brackets are spring-loaded? A: Spring-loaded brackets typically have a visible front panel, tab, or lever that moves when pressed. Unlike fixed brackets, you should see some kind of release mechanism on the front or sides of the bracket.
Q: What should I do if the spring mechanism is broken? A: Try using needle-nose pliers to manually operate the mechanism. If this doesn’t work, you may need to carefully pry the headrail out while supporting the blind weight, though this risks bracket damage.
Q: Can I reuse spring-loaded brackets for new blinds? A: Yes, as long as the brackets are in good condition and match the headrail dimensions of your new blinds. Inspect the spring mechanism and mounting integrity before reuse.
Q: Why won’t my bracket release mechanism work? A: Common causes include paint buildup, debris in the mechanism, or worn springs. Try cleaning the mechanism with compressed air or a small brush, and apply light lubricant if needed.
Q: How much weight can spring-loaded brackets typically support? A: Most residential spring-loaded brackets support 10-15 pounds per bracket, but this varies by manufacturer and bracket size. Check your bracket specifications for exact weight limits.
Read More: