Key Takeaways
- You can join copper pipe without solder using push fit, compression, press, or epoxy fittings.
- Push fit fittings are the fastest option, with no special tools required.
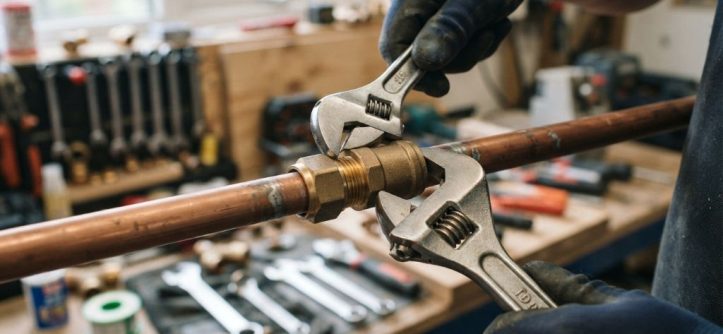
- Compression fittings offer a trusted, removable joint using just two wrenches.
- Clean, square-cut pipe is essential for every no-solder method.
- Always check local plumbing codes before choosing your connection method.
Last summer, I needed to replace a section of copper pipe running to my outdoor spigot. The problem was simple, but the solution was not. My rented townhouse did not allow open flames. Additionally, my soldering skills were nearly nonexistent. I watched a few torch tutorials, and my hands got sweaty just watching.
Then I discovered that soldering is optional. Plumbers use several other methods to join copper pipes every day. Some need special tools, and some need nothing but your hands. I tested three different methods over two weekends on various projects around my house. Every joint is still leak-free today.
Learning these methods saved me from hiring a plumber for a $300 job. Additionally, it opened the door to handling future repairs myself. In this guide, I will share the four best ways to join copper pipe without solder. You will learn exactly which method fits your project and skill level.
Why Join Copper Pipe Without Solder?
Soldering has joined copper pipes for nearly a century. However, it comes with real drawbacks for the average homeowner. Understanding these helps you see why no-solder methods have become so popular.
Fire risk tops the list. Soldering requires an open flame reaching over 400 degrees near wooden joists and walls. The National Fire Protection Association reports that torch-related fires cause significant property damage each year during plumbing and construction work. Therefore, many homeowners rightly fear the torch.
Beyond fire concerns, here are common reasons people skip soldering:
- No experience: Soldering takes practice to get a clean, reliable joint.
- No equipment: Torches, flux, and solder add up in cost.
- Tight spaces: Flames cannot safely fit inside cabinets or walls.
- Water in the line: Wet pipes refuse to heat evenly, ruining the joint.
- Building restrictions: Some apartments and rentals ban open flames entirely.
Additionally, no-solder methods are simply faster. A push fit connection takes under a minute. Soldering the same joint takes careful prep, heating, and cooling time. Therefore, DIYers and even professionals reach for alternatives on small repairs.
The good news is that modern no-solder fittings meet strict plumbing standards. Certified fittings handle the same household water pressure as soldered joints. As a result, you can choose these methods with real confidence. The key is picking the right method for your specific job.
Method 1: Push Fit Fittings, the Fastest Option
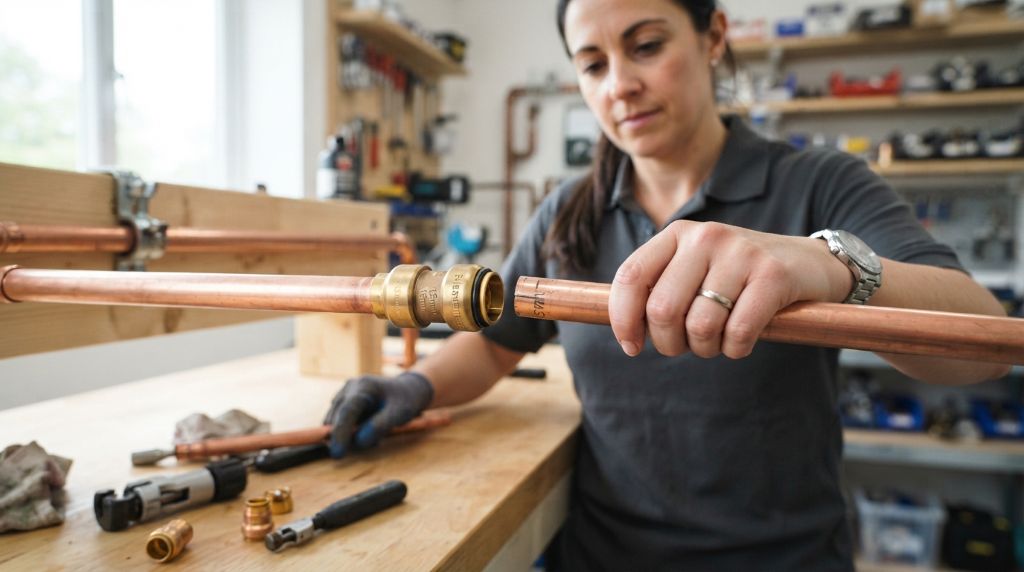
Push fit fittings are my go-to method for quick repairs. Brands like SharkBite created this technology, and it has changed home plumbing forever. The concept is brilliantly simple. You push the pipe into the fitting, and a rubber seal plus steel teeth do the rest.
Inside each fitting, a special O-ring compresses around the pipe. Meanwhile, stainless steel teeth grip the pipe firmly. Together, they create a joint rated for around 200 PSI. Therefore, these fittings handle typical home water pressure with ease.
The biggest advantage is speed. Here is what makes push fits so appealing:
- No special tools, glue, flux, or torch needed.
- Works on copper, PEX, and CPVC pipe.
- Removable with a disconnect clip if you make a mistake.
- Perfect for tight spaces where flames are unsafe.
- Ideal for beginners with zero plumbing experience.
Installation takes three simple steps. First, cut your pipe square and deburr the edges. Second, mark the insertion depth on the pipe. Third, push the pipe firmly into the fitting until it reaches the stop. Finally, pull gently to confirm the joint is locked.
However, push fits cost more than other options. Each fitting runs several dollars more than traditional types. Therefore, they shine on small repairs rather than large projects. My spigot repair used two push fit couplings. The total fitting cost was under $20, and the job took fifteen minutes.
One caution applies here. The copper must be clean and smooth for the O-ring to seal. Corroded or scratched pipe causes slow leaks. Therefore, always cut back to bright, clean copper before pushing.
Method 2: Compression Fittings, the Trusted Classic
Compression fittings have connected copper pipes for generations. If push fits feel too modern, this old-school method delivers proven reliability. Best of all, the parts cost very little at any hardware store.
A compression joint uses three parts. A brass nut slides onto the pipe first. Next comes a small metal ring called a ferrule or olive. The body of the fitting receives the pipe. When you tighten the nut, it squeezes the ferrule against the pipe. This pressure creates a watertight metal seal.
Here is the step-by-step process:
- Cut the copper pipe square and deburr both edges.
- Slide the compression nut onto the pipe.
- Slide the ferrule ring onto the pipe next.
- Insert the pipe fully into the fitting body.
- Slide the ferrule and nut up to the fitting threads.
- Tighten the nut by hand until snug.
- Give it one to two full turns with a wrench. Use a second wrench to hold the fitting body.
The two-wrench technique matters greatly. Holding the fitting steady prevents the joint from twisting loose inside the wall. Additionally, avoid overtightening, because too much force crushes the ferrule and causes leaks.
Compression fittings offer a middle ground. They cost less than push fits but need slightly more effort. Moreover, they create a removable joint, which helps with future repairs. Plumbers trust them for sink supplies, toilet lines, and ice maker connections.
However, they have limits. Most manufacturers do not rate them for permanent use inside walls. Therefore, use them in accessible locations. My garden shed supply line uses compression fittings, and they have held perfectly through two winters.
Method 3: Press Fit Fittings, the Professional Choice
Press fittings are what professional plumbers use when they skip the torch. This method creates the most solder-like joint of all. However, it requires one special tool that raises the cost.
A press fitting looks similar to a sweat fitting. However, it contains a hidden O-ring inside. A battery-powered press tool crimps the fitting onto the pipe with tremendous force. The crimp compresses the O-ring and locks the connection permanently. The result looks and behaves almost exactly like a soldered joint.
Here are the key facts about press fittings:
- Permanent joints approved for behind-wall installation.
- Fast connections, roughly five seconds of crimping each.
- No flame, no fire watch, no permits for hot work.
- Excellent for large projects with many joints.
- Very low failure rate when installed correctly.
The catch is the tool. A proper press tool costs hundreds of dollars to buy. Therefore, this method suits big projects or repeated use. Some tool rental shops and home centers offer press tool rentals at reasonable daily rates. Additionally, many plumbers will press-fit your connections for a small fee.
If you are replumbing a bathroom or running many new lines, press fittings deserve serious consideration. The speed is remarkable. A pro can complete dozens of joints in an hour. Meanwhile, soldering the same number would take half a day with all the prep work.
For most homeowners tackling one small repair, push fit or compression fittings make more sense. However, knowing this method exists helps you ask the right questions when hiring help.
Method 4: Epoxy Repair Couplings for Emergencies
Sometimes you need a fix right now, and the hardware store options are limited. Epoxy repair couplings fill that gap. These fittings slip over a damaged pipe and seal with a special resin.
An epoxy coupling is a copper sleeve lined with epoxy putty. You clean the pipe, push the sleeve over the damaged section, and let the resin cure. After about an hour, it forms a rigid, waterproof seal around the pipe. No clamps, no crimping, and no heat required.
Follow these steps for a solid result:
- Shut off the water and drain the line completely.
- Sand the pipe surface until clean and rough.
- Wipe away all dust with a dry cloth.
- Slide the coupling over the damaged area.
- Center it over the leak and let the epoxy cure fully.
- Restore water slowly and check for drips.
Surface prep decides success here. The epoxy bonds to the pipe, so any dirt or oxidation weakens the bond. Therefore, sand thoroughly and dry completely before applying.
However, I must be honest about this method. Most epoxy couplings are rated as temporary or limited-use repairs. Many plumbers consider them a stopgap, not a permanent solution. Additionally, some plumbing codes do not recognize them for permanent work. Therefore, plan to replace the repair with a push fit or compression joint later.
I keep one epoxy coupling in my emergency kit. It bought me three days of running water when a pinhole leak appeared on a Sunday night. That temporary fix saved my weekend. Then I installed a proper fitting the following week. Used this way, epoxy couplings are genuinely handy.
Choosing the Right No-Solder Method for Your Project
Each method has clear strengths. Matching the method to your job saves money and prevents problems.
Consider these pairings before you start:
- Emergency leak repair: Push fit fittings for speed and simplicity.
- Supply lines under sinks: Compression fittings for low cost and reliability.
- Whole-room replumbing: Press fittings with a rented tool.
- Weekend pipe damage: Epoxy coupling now, proper fitting later.
- Tight cabinets or walls: Push fits, since they need almost no clearance.
Budget also plays a role. Push fits cost the most per joint but require zero tools. Compression fittings cost little and need only wrenches you probably own. Press fittings cost less per joint but need an expensive tool. Epoxy couplings are cheap but temporary.
Skill level matters too. Beginners should start with push fits, because mistakes are easily reversed. Compression fittings require a bit more feel for proper tightening. Press fittings demand the right tool, not the right technique. Therefore, most DIYers collect experience in that order.
Finally, check your local plumbing codes before starting. Some areas restrict certain fitting types inside walls or under floors. A quick call to your building department takes minutes and prevents expensive redo work later.
Common Mistakes to Avoid When Joining Copper Without Solder
No-solder methods are forgiving, but they still fail when installed carelessly. Avoid these errors, and your joints will last for decades.
Skipping pipe prep is the top mistake. Every method depends on a clean, square-cut pipe end. Rough cuts and burrs damage seals and prevent full insertion. Therefore, always use a pipe cutter, deburr thoroughly, and wipe the pipe clean.
Other frequent errors include:
- Not inserting pipe to the full depth mark on push fits.
- Overtightening compression nuts until the ferrule crushes.
- Forgetting to slide the nut and ring on before assembling.
- Using damaged or corroded pipe that cannot seal.
- Reusing old ferrules or fittings from previous projects.
- Skipping the final leak check before closing cabinets.
Testing matters more than people realize. After installation, turn the water on slowly. Watch every new joint for a full minute. Then dry each connection with a paper towel and check again after ten minutes. Slow weeps often take time to appear.
My compression fitting mistake taught me this lesson. I tightened the nut with one wrench, letting the fitting twist. The joint held at first, then wept slightly a week later. Reinstalling it properly with two wrenches solved the problem permanently. Five extra seconds would have prevented the whole repair.
Conclusion
Joining copper pipe without solder is easier than ever. Push fit fittings offer speed and tool-free installation for quick repairs. Compression fittings provide a cheap, trusted option using basic wrenches. Press fittings deliver professional, permanent joints for bigger projects. Meanwhile, epoxy couplings can handle true emergencies until a better fix arrives. If you want to learn more about one of the most reliable no-solder options, check out this guide on how to connect copper pipe with a compression fitting.
My torch-free journey started with one dripping spigot. It ended with new skills, real savings, and zero singed wooden joists. Whatever your project, a safe no-solder method exists for you. Start with a push fit fitting on a small repair, and build your confidence from there.
Now it is your turn. Have you joined copper pipe without solder? Which method worked best for your project? Share your story in the comments below. Additionally, if this guide helped you, share it with a friend who fears the torch. Your next plumbing repair just got much easier!
Frequently Asked Questions
What is the easiest way to join copper pipe without solder?
Push fit fittings are the easiest. Clean the pipe, mark the depth, and push the fitting on. No tools are required.
Are no-solder copper joints as strong as soldered joints?
Yes, certified push fit and press fittings meet the same pressure standards. Proper installation matters more than the method.
Can compression fittings be used inside walls?
Most manufacturers and codes discourage it. Use compression fittings in accessible locations where leaks are easy to spot.
Do push fit fittings work on all copper pipe types?
Yes, they work on standard L and M copper. The pipe must be clean, round, and free of heavy corrosion.
How long do push fit fittings last?
Quality fittings are rated for decades behind walls when installed correctly. The rubber O-ring is the main factor in longevity.