If in your house there is never a Christmas tree missing, surely decorating it becomes a ritual. If you have children it will be a fun time to share as a family, and if you do not have them, it will be, in the same way, a special tradition that you want to live every year.
The balls are the complements that are always present in the Christmas firs. Today I want to teach you three ideas so that you can make DIY decorations for the Christmas tree with your own hands. Custom and very decorative. Now the fun will come twice: when you do them and when you place them.
Colorful Christmas Ball
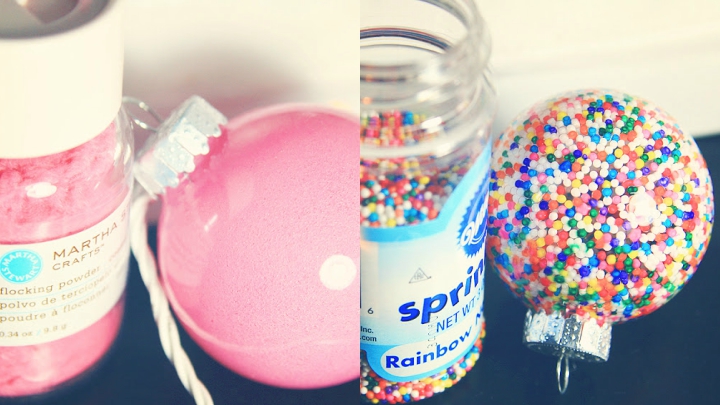
As I said at the beginning, the balls are the most used accessory to decorate the Christmas tree. But you have many options to do it. The idea that I show you next is from the blog Little Gray Fox and it consists of making a colorful ball for your tree.
To make it you will need Christmas balls made of transparent plastic or glass. You can fill them with feathers, artificial snow, pine needles … In this case they have decorated them with paint and with small colored balls.
For the graffiti, what you have to do is to introduce a spoonful of acrylic paint inside the decoration (with a small amount at the beginning, you are always in time to add it). You turn the ball slowly so that the entire interior is covered. Then, place it face down on a plastic bottle or cup so that, for about 24 hours, remove excess paint. Adjust the lid and ready to hang.
If you prefer many colors, you just have to put inside a selection of balls with your favorite tones.
An ornament in the shape of a hot air balloon
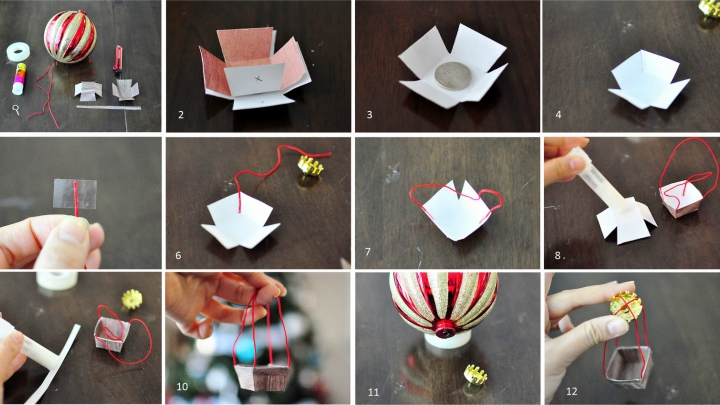
This second idea has enchanted me. I have seen it in the blog The Cheese Thief , where you will find the template to make the baskets of this balloon so Christmas. The materials you will need will be:
– A Christmas ball.
– Glue stick.
– Scotch tape.
– Scissors.
– Rope.
– A coin.
You may also like to read: 3 crafts to make original Christmas trees
How to make your balloon
The first thing we will do is create the structure of the basket. Then, stick a coin of 5 or 10 cents so that the basket has some weight. Then, stick the rope to the basket in the way we see in this sequence of photographs, with two crossed pieces joining the opposite corners. Then, remove the cover of the ornament and put the rope forming an X. In this blog we also explain that you can make the basket of the balloon using a bottle cap, sticking the strings with silicone.
Pompoms ornament
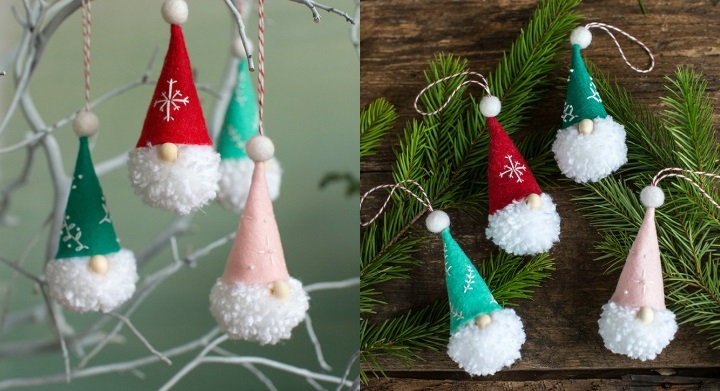
The third and final idea to create a decorative ornament for your Christmas tree is from the blog Lia Griffith and it is, simply, wonderful. It has the form of a gnome and you will need it to do so.
– Hot glue.
– Scissors.
– Several pompoms (already made or if you want to work more, make them yourself with wool).
– Needle and thread.
– Felt.
– Wooden beads.
– Rope.
The big pompom will be the face of the gnome, as I said, you can do it yourself with wool (there are tools that help you make them) or buy it already made. It will be white. With the felt we will make the hat, with triangular pieces stuck in cone form. If you feel like it, you can embroider Christmas motifs with the needle and thread.
Next, pass the rope inside the cone and place a smaller pompom, also white, on top. Glue the large pompom to the hat and add a wooden bead that will be the nose. Your funniest Christmas ornament will be ready to be hung from the tree!
Tags: Christmas Tree, Decorate, DIY



Leave a Reply
You must be logged in to post a comment.