Painting a room sounds simple. You pick a color, grab a brush, and start rolling. However, without the right tools and techniques, even the best paint can end up looking messy. The difference between a professional-looking finish and a patchy, uneven result often comes down to the tools you use and how you use them.
This article is your complete home tools guide to DIY painting. Whether you are a first-timer or someone who has painted before, you will find practical advice here. We will cover every essential tool, from brushes and rollers to drop cloths and painter’s tape uses that most people overlook. By the end, you will feel confident enough to tackle any painting project in your home.
Why the Right Tools Matter
Many people underestimate the power of good tools. They assume any old brush will do the job. Unfortunately, that thinking leads to frustration and wasted time.
The right tools help you work faster. They also help you achieve cleaner edges, smoother surfaces, and more even coverage. Additionally, using proper tools can actually save you money. You use less paint, make fewer mistakes, and avoid costly do-overs.
Therefore, before you open a single can of paint, take a moment to gather the correct equipment. It will make the entire process smoother and more enjoyable.
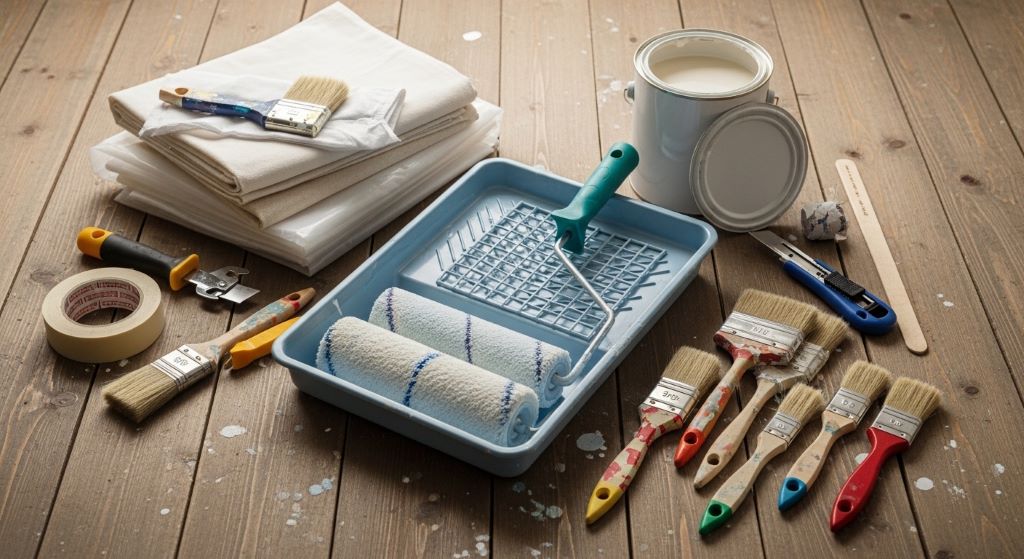
Essential DIY Painting Tools You Need
Paint Brushes
A quality paint brush is the foundation of any painting project. Brushes come in several types, and each one serves a specific purpose.
Angled brushes are ideal for cutting in around edges, corners, and trim. They give you more control in tight spaces. Flat brushes, on the other hand, work well for applying paint to larger, flat surfaces like doors and cabinets.
When choosing a brush, pay attention to the bristle type. Synthetic bristles work best with water-based latex paints. Natural bristles are better suited for oil-based paints. A good brush holds more paint and releases it evenly, which reduces streaking.
Always clean your brushes thoroughly after each use. A well-maintained brush can last for years and continue to perform at a high level.
Paint Rollers and Covers
For painting large wall surfaces, nothing beats a paint roller. Rollers cover more area quickly and create a more uniform finish than brushes alone.
The key to using a roller well is choosing the right nap thickness. A short nap of around 3/16 to 1/4 inch is best for smooth walls. A medium nap of 3/8 to 1/2 inch works well for slightly textured surfaces. For rough or heavily textured walls, choose a thicker nap of 3/4 inch or more.
Additionally, use a roller frame that feels sturdy and comfortable in your hand. A wobbling roller leads to an uneven coat. Pair your roller with a roller tray or a five-gallon bucket with a roller screen for the best results.
Painter’s Tape
One of the most underrated tools in any DIY painter’s kit is painter’s tape. Understanding painter’s tape uses can completely transform the quality of your work.
Painter’s tape creates clean, sharp lines between surfaces. You use it along baseboards, window frames, door casings, and ceiling edges. It protects surfaces you do not want painted and eliminates the need for a very steady hand.
However, there is a right way and a wrong way to apply it. Always press the tape down firmly along its full length, especially along the edge that will face the paint. If the tape is not sealed properly, paint will bleed underneath and ruin your lines.
Remove the tape while the paint is still slightly wet for the cleanest result. If you wait until the paint is fully dry, it can peel off along with the tape. Pull the tape back at a 45-degree angle, slowly and steadily.
There are different types of painter’s tape available. Standard blue tape works well for most indoor projects. Delicate surface tape is gentler and is ideal for freshly painted walls or wallpaper. Therefore, choose the tape that matches your specific surface type.
Drop Cloths
Drop cloths are your best defense against paint drips and spills. They protect your floors, furniture, and carpets from accidental splashes.
Canvas drop cloths are the most durable option. They are reusable, absorbent, and stay flat on the floor without sliding. Plastic drop cloths are cheaper but tend to bunch up and become slippery underfoot, which can be a safety hazard.
Cover every surface you do not want painted. Even experienced painters drip occasionally. Therefore, taking a few extra minutes to lay down drop cloths can save you a lot of cleanup time later.
Paint Trays and Liners
A paint tray gives you a convenient place to load your roller with paint. The ridged section at the top helps you distribute paint evenly across the roller cover, which prevents dripping and over-loading.
Tray liners are a smart addition to your setup. They fit inside your standard tray and make cleanup incredibly fast. Once you are done painting, you simply remove the liner and dispose of it. This keeps your tray clean and ready for the next project.
Some painters prefer a five-gallon bucket with a roller grid instead of a tray. This works especially well for large rooms because you can pour a lot of paint at once and reload your roller quickly.
How to Prepare Your Space Before Painting
Preparation is just as important as the painting itself. In fact, many professionals spend more time preparing than they do actually painting.
Start by clearing the room as much as possible. Move furniture to the center or out of the room entirely. Remove outlet covers, switch plates, and light fixtures if you can.
Next, clean the walls. Dust, grease, and dirt can prevent paint from sticking properly. Wipe walls down with a damp cloth or a mild cleaning solution. Allow them to dry completely before you begin.
Fill any holes or cracks with spackling compound. Sand the dried filler smooth, then wipe away the dust. This step ensures your walls look clean and even after painting.
Apply primer if you are making a dramatic color change or painting over a dark color. Primer helps the topcoat adhere better and can reduce the number of coats you need to apply. Additionally, it creates a more uniform base, especially on new drywall or repaired surfaces.
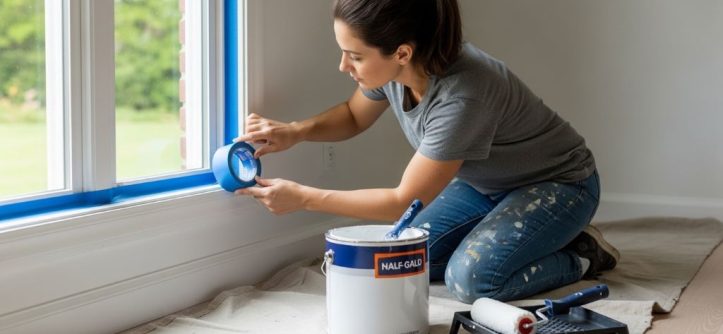
Once your prep work is done, apply painter’s tape to all the areas you want to protect. This is where painter’s tape uses really make a difference. Take your time with this step, as straight, clean lines are what separate an amateur job from a professional one.
The Correct Order for Painting a Room
Most people do not realize there is a specific order to painting a room. Following this order helps you avoid drips on freshly painted surfaces.
Always start with the ceiling. Use a brush to cut in around the edges, then roll the main area. Work in sections and keep a wet edge to avoid lap marks.
Next, paint the walls. Again, cut in along the edges with a brush first. Then use your roller to fill in the larger areas. Work from top to bottom and maintain a wet edge as you go.
Finally, paint the trim, baseboards, and doors. These areas require a brush for precision. Because you have already used painter’s tape to protect adjacent surfaces, you can apply the trim paint with confidence.
However, if you prefer to paint the trim first, that is also acceptable. In that case, let the trim dry completely before applying painter’s tape over it and painting the walls.
Tips for Achieving a Smooth, Professional Finish
Getting a smooth finish takes a bit of practice, but these tips will help you get there faster.
Always stir your paint thoroughly before use. Paint separates when it sits, and unstirred paint can lead to inconsistent color and sheen. Do not shake the can, as this introduces bubbles that can show up on your walls.
Apply thin, even coats rather than one thick coat. Thick coats take longer to dry, are more prone to drips, and often look uneven. Two or three thin coats will give you a richer, more durable result.
Maintain a wet edge as you work. This means overlapping each stroke with the previous one before it dries. When paint dries before you overlap it, you get lap marks that are difficult to fix.
Use good lighting while you paint. A bright work light held at an angle reveals drips, missed spots, and uneven areas that normal overhead lighting might hide. Therefore, take a moment to inspect your work under different lighting before moving on.
Allow each coat to dry fully before applying the next one. Rushing this step is one of the most common mistakes DIY painters make. Check the paint can for the recommended drying time, and always err on the side of patience.
Cleaning and Storing Your Tools
Taking care of your tools after each project ensures they will perform well the next time you need them.
Clean brushes and rollers promptly after use. For latex paint, warm water and soap work well. For oil-based paint, you will need mineral spirits or paint thinner. Rinse until the water runs clear, then reshape the bristles and allow them to dry completely.
Store brushes hanging or lying flat, never resting on their bristles. Hanging them allows the bristles to keep their shape and dry evenly.
Roller covers can be cleaned and reused, but many painters prefer to use inexpensive covers and discard them after each job. If you do reuse them, store them wrapped in plastic to keep them from drying out.
Partially used paint cans should be sealed tightly and stored in a cool, dry place away from direct sunlight and extreme temperatures. Properly stored paint can last for years.
Conclusion
A perfect paint finish is absolutely within reach for any DIY homeowner. The secret lies in using the right tools and following the right steps. Start with quality brushes and rollers that match your paint type and surface texture. Use drop cloths to protect everything around you. Understand painter’s tape uses so you can create crisp, clean lines with ease. Prepare your surfaces carefully before you begin, and always follow the correct order when painting a room.
Additionally, apply thin coats, maintain a wet edge, and give each layer adequate drying time. Clean and store your tools properly so they are ready for your next project.
This home tools guide has given you everything you need to approach any painting project with skill and confidence. With a little preparation and the right equipment, your walls will look like they were done by a professional.
Frequently Asked Questions
What is the best type of painter’s tape for indoor walls?
For standard indoor walls, blue painter’s tape works well. If the walls have been recently painted or are delicate, choose a low-tack delicate surface tape to avoid pulling off any existing paint.
How long should I leave painter’s tape on before removing it?
Remove painter’s tape while the paint is still slightly wet, ideally within an hour of applying your final coat. This gives you the cleanest edge. If the paint has dried completely, score along the tape edge with a utility knife before peeling.
Do I always need to use primer before painting?
Not always. However, primer is strongly recommended when you are covering a dark color with a light one, painting new drywall, or repainting surfaces that have stains or repairs. In these situations, primer improves coverage and helps the topcoat last longer.
How many coats of paint does a typical room need?
Most rooms need two coats of paint for full, even coverage. If you are making a dramatic color change or using a lighter color over a darker one, you may need three coats. Always allow each coat to dry fully before applying the next.
Can I reuse paint rollers after cleaning them?
Yes, you can reuse paint rollers if you clean them thoroughly. Wash them with warm soapy water for latex paint or mineral spirits for oil-based paint. Rinse completely and allow them to dry before storing. A well-cleaned roller can be reused several times.
Related Topics:
Preparing for Success – A Step-By-Step Guide to Preparing Doors and Trim for Painting
How to Safely Paint Asbestos Siding: A Step-by-Step Guide