
The memories of good moments lived remain forever in our memory. Although the photographs always help to keep them in mind. Close. So, today I want to show you three different crafts to hang your photos of your vacations, your favorite trips or the people that make you smile just by seeing them in a snapshot. They are three different ways that you have your best memories in sight. They are also very easy to make! We get down to work.

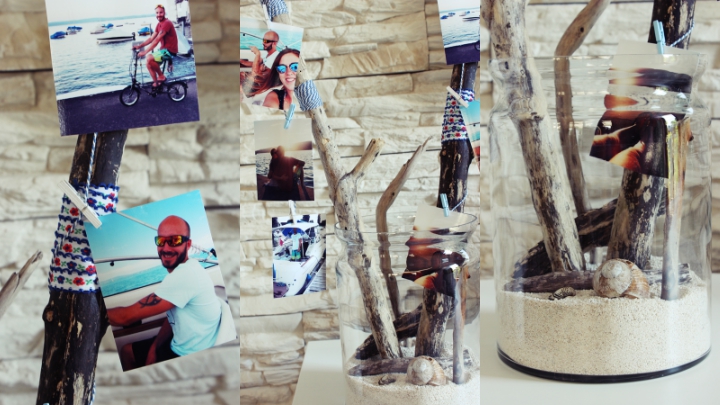
A glass of memories
The first DIY is consists of creating a personalized glass where you can hang the photos of your best summer or splash it from different moments that you love to remember. It has a beach feel and for that reason the summer photos are very cool, although you can put the ones you want and change the decoration of the glass if you prefer.
You will need …
– A tall and wide glass
– Wooden trunks
– Sand (if it’s your last vacation, better than better)
– Printed photos (in polaroid format are very cool)
– Colored thread and ribbons
– Small tweezers
– Conch shells, shells …
How to make your glass of memories?
The first thing we will do is print the photographs. Then, wrap the wood, in certain sections, with the colored thread or ribbons. Leave a longer thread to hang the photos, holding them with the tweezers. In the glass that serves as a base, put sand, shells, seashells … Whatever you want. If you do not want to focus so much on summer theme you can create another base with stones, colored marbles … And the result is as decorative and beautiful as this.
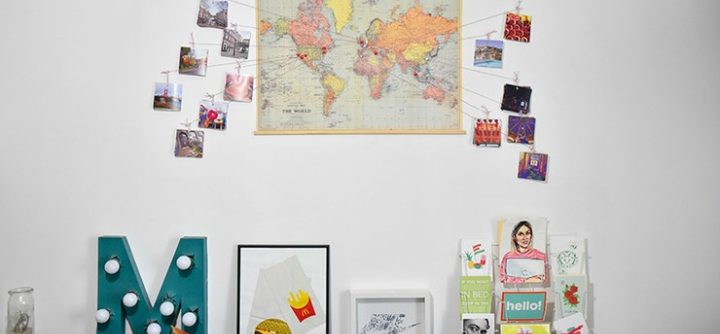
DIY map with your best trips
I liked this idea a lot. It is from the blog You Make Fashion and to do it you will need a map, thread of colors, pins and thumbtacks and printed photos. As I mentioned before, in polaroid format or simply square, for example, can be very nice.
You may also like to read: Ideas for decorating with paper lace
The steps you have to take
The map can be framed yourself with some wooden strips, put a frame already made or take it to a specialized store. You will not be able to carry glass since we are going to put thumbtacks in it. All you have to do is mark on this map of the world the places you have visited and draw a thread to the wall. Hold the end with a pin or with a hook that you do not need to pierce, and hang your photographs, which you have previously made a hole to pass a piece of string that is the one that you will hook on the wall. Too easy! And you will always have those memories of when you visited that place.
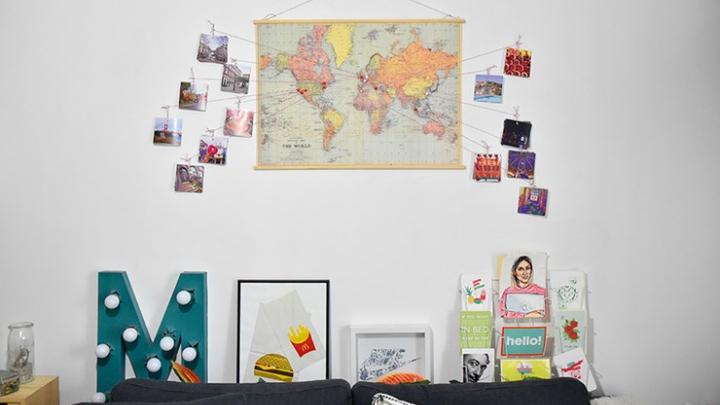
Photo hanger for the wall
The last DIY that I teach you is also very simple and quick to do. I’ve seen the idea in blog Society 19 and you’re just going to need a branch or a stick, the photographs you want to hang, a hole punch and rope.
The craft, step by step
First, cut five strings of a length that depend on the photos you want to put and how separated they are. If the stick is longer it cuts more sections. Make a hole in the top and bottom of each photo. Then, pass the thread through them and tie a knot in each hole so that they are securely fastened and do not fall to the ground. Repeat this operation with all the photographs and hold the stick on the wall.
As you can see, with these three ideas so easy and fast you will be able to have your pictures in view in a very decorative way. So that you do not miss any memories.


Leave a Reply
You must be logged in to post a comment.