If you’re anything like me, home plumbing projects aren’t always at the top of your to-do list. But maintaining your water heater is essential to keeping it running efficiently and extending its lifespan. Trust me, I learned this the hard way when my old water heater up and quit on me without warning. Not fun! One of the easiest and most important maintenance tasks is draining your water heater tank every six months to a year. Doing so flushes out built-up sediment that can lead to problems over time. I’ll walk you through the complete process in this guide on how to drain water heater.

Why Draining Your Water Heater Matters
Before we dig into the nitty gritty details, it’s worth covering why draining your hot water tank is so critical in the first place. I know, I know – it sounds like an annoying chore when you just want hot showers. But trust me, taking a few minutes twice a year to drain the tank prevents way bigger headaches down the road.
See, over time sediment from your home’s water supply builds up at the bottom of the tank. Things like mineral deposits and corrosion. If too much collects, it can lead to some frustrating issues:
- Reduced efficiency – Sediment buildup makes your water heater work harder to heat water, wasting energy and costing you extra money.
- Strange sounds – Excess sediment can cause odd noises like popping or cracking coming from the tank.
- Faulty heating elements – Gunk buildup can cause heating elements to fail prematurely.
- Other damage – Stuff like leaks, anodes wearing out faster, and bacterial growth. Yuck!
Not good, right? But the good news is draining the tank regularly helps avoid all this by flushing that junk out. Think of it like changing the oil in your car – routine maintenance goes a long way!
What You’ll Need To Drain a Water Heater
Alright, let’s talk about what gear you’ll need for this project. The great thing is, it’s just some very basic stuff:
- An adjustable wrench or pair of channel lock pliers
- A garden hose
- A bucket (two could be handy depending on tank size)
- Rags or towels
- Gloves (optional)
- Headlamp/flashlight (optional but helpful)
Chances are you’ve already got most, if not all, of these things in your home. Before getting started, gather everything up and set the bucket(s) nearby so they’re ready to catch drained water.
Turn Power & Water Supply Off
I think it’s always smart to focus on safety with any DIY project, no matter how big or small. Draining a hot water heater is no exception. As they say, better safe than sorry!
There are two very important things to do before going any further:
Shut Off Power Supply: Start by locating your home’s electrical panel and switching the circuit breaker for the water heater power to the “off” position. Safety first!
Shut Off Water Supply: Next, find the cold water shut-off valve leading to the water heater and turn it clockwise all the way until it’s completely closed.
Take an extra minute double and triple checking both the power and water are securely switched OFF! It may seem tedious but trust me, this simple step avoids potential mishaps.
Locate the Drain Valve on the Water Heater
Now the fun starts! The next step is finding the drain valve, which allows accumulated sediment and water to drain out of the tank when opened.
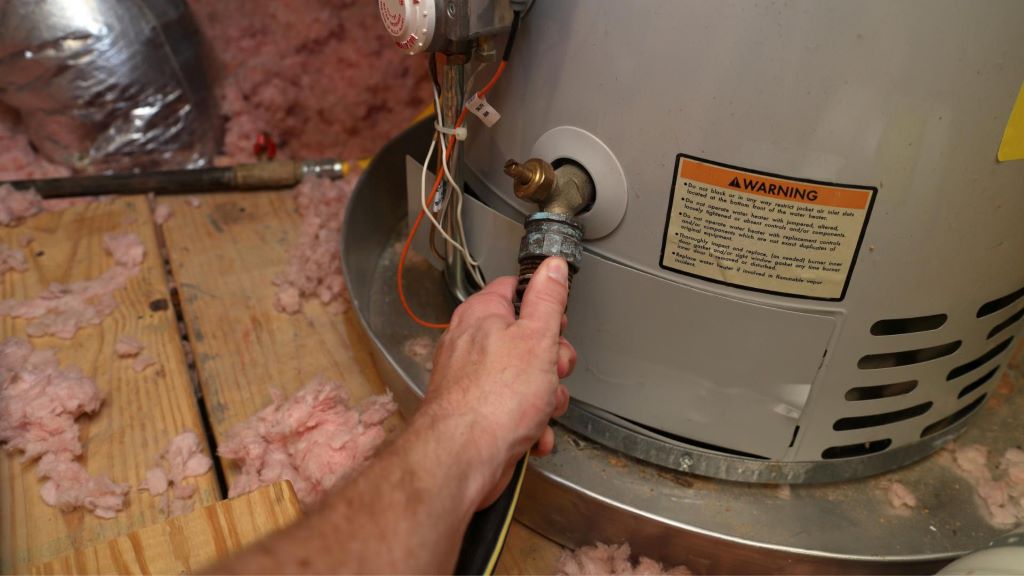
Typically the valve will be at the bottom of the water heater near the front, but locations can vary slightly by model. It may have a small hose connection or hookup for attaching your garden hose to divert water straight into a bucket as you drain.
Important note! On newer tankless water heater models, you may find an additional isolation valve on the cold water intake. Make sure this is switched off too or else water will keep flowing in from the supply as you try to drain!
Attaching a Garden Hose to Drain
Assuming your drain valve has a place to connect a garden hose, this next part is simple. Just screw on your hose securely so the end is positioned to drain straight into your prepared bucket.
Having the hose directed into a container keeps things tidy and avoids creating a slippery mess! A large bucket or even a couple smaller ones should do the trick nicely to capture all the drained water, unless your tank is exceptionally large.
Opening the Hot Water Heater Drain Valve
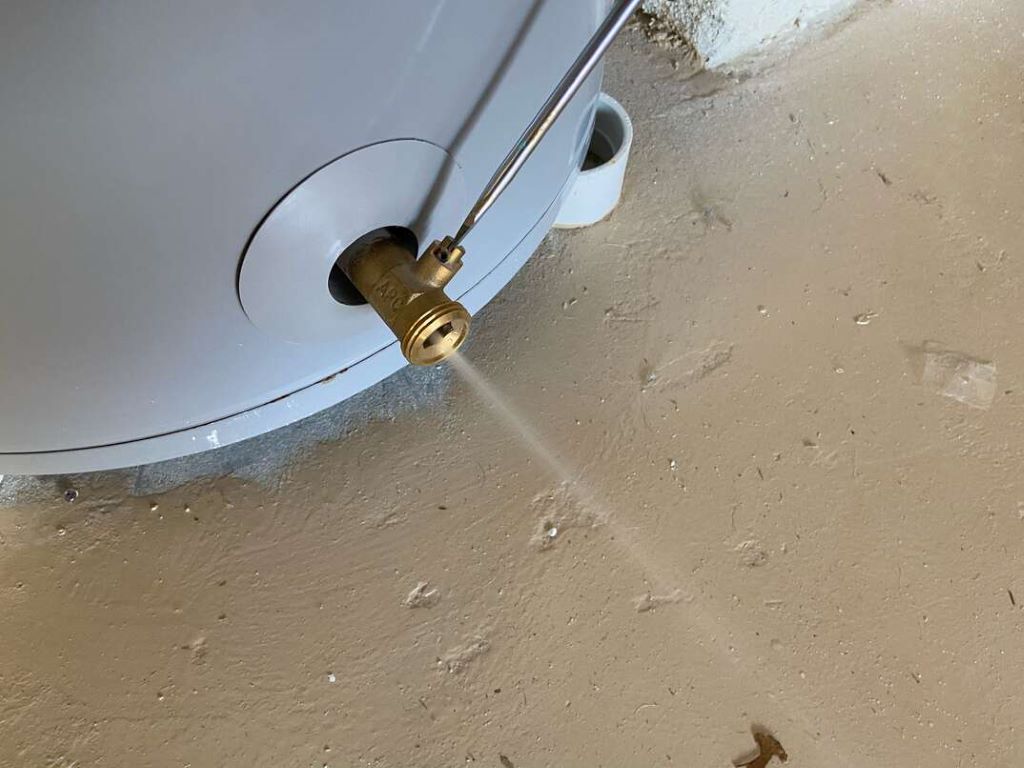
Here comes the actual draining! With your hose set up and bucket(s) strategically placed, slowly twist the drain valve counterclockwise until it’s completely open. Opening it gradually gives you better control over flow.
Immediately, you’ll observe hot water gushing from the tank through the attached garden hose and filling the bucket. Let it flow!
Depending on how much sediment has accumulated, the first few seconds might sputter a bit. It may even eject some discernible gunk at first – that’s a GOOD thing since the whole point is flushing out buildup!
It’s normal for the water to be hot at first but cool gradually as the tank empties. Mine usually runs full blast for 2-3 minutes before slowing to a trickle when nearly drained.
Flushing Out Any Remaining Sediment
Once flowing slows to a drizzle, I like to take the extra step of flushing any leftover sediment still lurking in there.
Simply close the drain valve all the way, remove your garden hose, and reconnect the cold water intake piping. Open the intake back up slowly and let the tank refill completely over the next 20-30 minutes.
Then repeat the draining process a second time – you’ll likely observe dirty water rushing out initially again before clearing up!
This one-two punch really helps clean out ALL accumulated gunk for maximum efficiency and performance after refilling once more. Consider it going the extra mile.
Closing Up the Drain & Restoring Water/Power
You’re in the home stretch! To wrap things up:
- Firmly close the drain valve clockwise again
- Disconnect and neatly coil your garden hose
- Reopen the cold water intake piping to refill the emptied tank
- Last but not least, flip the electrical power back on via your home’s breaker panel
Over the next 30-45 minutes, the tank will refill itself fresh and you’ll have clean hot water ready for showers and anything else!
As a final step once fully refilled, go inside, turn on a hot water faucet and check the temperature. Leave it open for 5 full minutes checking for stable output temperature.
Doing so bleeds any last trapped air or sediment from your piping. And enjoy that revitalizing hot shower you’ve earned! Just try not to sing too loudly until other family members are awake.
Tips For Smooth Water Heater Draining
Through some trial and many errors attempting home plumbing repairs, I’ve picked up a few useful tips for painless water heater draining:
Go Slowly! When opening valves, go nice and slow to avoid pressure bursts. And when drained enough initially, close slowly too. Gradual is key!
Place Bucket Strategically! Position your drainage bucket(s) to catch every drop and prevent spills or slippery spots. Nobody likes mopping accidentally flooded floors first thing in the morning!
Check For Leaks! As water begins flowing out, visually inspect joints around valves for any drips or leaks. Immediately turn OFF if a leak occurs and retry sealing the connection.
Consider Drain Pan! Adding a basement drain pan is smart insurance in case leaks ever develop. They capture drips before causing water damage.
Review Manual! Still unsure on a step? Dig out your specific unit’s manual or lookup the model online for brand recommendations.
Enlist Help! If needed, have someone lend an extra set of hands, especially when refilling to check for trapped air bubbles. Teamwork makes the dream work!
Give It Time! Be patient and allow sufficient time for a complete drain followed by full refill before resuming dishwasher cycles or laundry loads needing hot influx.
Doing any one of these can make your hot water heater draining less stressful!

Potential Draining Challenges and Solutions
Of course, it wouldn’t be DIY if there weren’t potential hiccups! Over many years tackling my own home plumbing repairs, I’ve faced a couple common challenges:
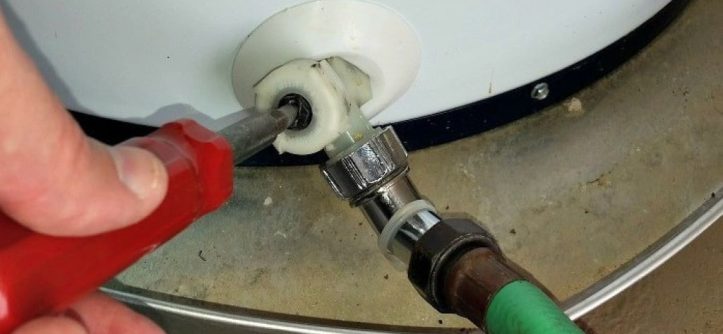
Valve Stuck Shut: It happens! Sediment buildup or mineral deposits sometimes make valves stubborn. Grab your WD-40 or another penetrating lubricant to generously coat the valve. Let it soak 15+ minutes before gingerly trying again to loosen. Still stuck? It may be time to replace the valve!
Water Backflow Into Tank: Tricky issue where drained water reverse flows back in, especially if your unit lacks a one-way check valve. Elevate your drainage hose into empty buckets above tank level to prevent. Or secure an inexpensive hose-bibb vacuum breaker adapter from your hardware store for the same impact.
No Drain Valve At All: Very old heaters may lack integrated drain valves, unfortunately. Options are limited: either replace tank or carefully siphon out water manually via disconnected intake/outflow pipes. Tedious but it’ll work! Just be sure to immediately replace gaskets on any disconnected fittings after.
Odd Noises Mid-Drain: Loud banging or popping sounds while draining likely signal trapped air pockets escaping. Harmless but startling! Simply let it fully drain out and the noise should disappear. Worst case, refill and repeat draining a second time.
Leaky Garden Hose Connection: Another annoyance! Confirm your hose fits snugly and doesn’t deflate allowing exterior air pockets during draining. Swap to washers better matching your connector size or wrap valve threads with plumber’s tape to prevent slow drips mid-drain.
Hopefully thinking ahead helps avoid any headaches on your next water heater maintenance adventure. But now worries at least you’ve got proven troubleshooting tricks handy!
Warning Signs It’s Time To Drain
We all get busy, but don’t put off draining too long! Here are a few clear warning signs it’s time you schedule a draining session:
Declining Hot Water Quality: Lukewarm showers becoming the norm in winter? Notice rust-colored residue upon running hot water? Both point to sediment accumulation affecting output quality from your heating elements. Time for that flush!
Higher Energy Bills: Closely correlated with the above. If your monthly utility costs slowly creep up without usage changes on your part, mineral buildup making your unit work harder is a likely culprit.
Creeping Odor: This one makes it obvious when draining is overdue! The smell of sulfur or rotten eggs from your hot water points to sediment corrosion releasing hydrogen sulfide gas. Not healthy to keep inhaling – drain asap!
Strange Noises: Weird gurgling, popping, rumbling or cracking sounds coming from your water heater now and then also indicate excess sediment interfering with smooth operation.
Rust Accumulation: Visible rust flakes in the hot water itself is a clear red flag too. Time to flush that tank!
When noticing any of the above warning signs, put draining at the top of your priorities before problems like leaks arise. An hour of preventative maintenance today saves bigger headaches down the line!
FAQs
How often should I drain my hot water heater?
Ideally target flushing sediment buildup every 6 months to 1 year. Even more frequently if you noticed tons of gunk or operating issues last draining session! Checking anodes every 3 years also helps maximize tank lifespan.
Where does the drained water go?
Use your drainage hose strategically directed right into one or more empty buckets rather than flooding basement floors! Take drained buckets outside for disposal whenever full. Not exactly fun work but beats a big mess.
Do I need any specific skills or experience?
Nope, DIY draining requires no special skills at all! As long as you carefully follow instruction steps and safety precautions around electricity + water, it’s a very straightforward process anyone can tackle at home.
What type of water heaters can I drain myself?
Most standard residential gas, electric and even tankless water heater models include integrated drain valves, making DIY maintenance like this possible. Just double-check check manual for your specific unit if unsure. Call a handy neighbor to assist if yours lacks a drain valve.
What should I do if the valve won’t fully close again?
First, confirm nothing obstructs the valve threads. Then try firmly closing the valve with both channel locks and a wrench simultaneously. Check for secure closure before refilling the tank. If still leaking from the valve itself, replacement ASAP is required to avoid needing a bigger unit repair later.
Wrapping Up
We covered a lot of ground on properly draining a water heater yourself! It may feel like a mundane task, but preventative maintenance saves bigger hassles down the road.
The key steps are:
- Turn water and power OFF safely
- Connect garden hose set to drain
- Open the valve gradually and flush it completely
- Refill the tank & double-check the temperature
- Mark your calendar for the next draining session!
Remember, taking good care of your home’s water heater adds up to better efficiency and plenty of hot water for your family. And tackling repair projects like this yourself leaves more weekend time for fun while building awesome confidence, and taking on the next DIY adventure!
Hopefully, this guide on how to drain the water heater gave you everything needed to knock draining out quickly. After successfully preventing and dealing with clogged drains using the comprehensive guide, if any other questions arise on maintaining your hot water system, don’t hesitate to reach out! Now, who’s up for pizza and a movie after all this hard work?
Tags: diy projects, do it yourself, home improvement, home maintenance, plumbing tips, water heater draining, water heater maintenance


