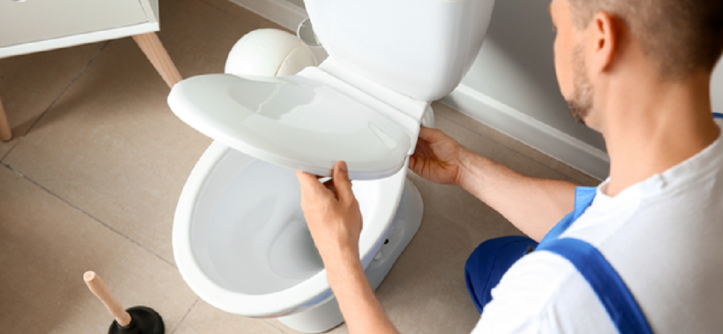
To replace a toilet seat, first locate and unscrew the bolts attaching the old seat, then remove it and place the new seat in position and screw the bolts back in place securely. When it’s time to update your bathroom, replacing a toilet seat is a simple yet effective way to freshen up the space.
Whether it’s due to wear and tear or you want to give your bathroom a new look, installing a new toilet seat can make a noticeable difference. Thankfully, the process is straightforward and doesn’t require any specialized skills. In this guide, we’ll walk you through the steps to replace a toilet seat, giving you the confidence to tackle this DIY project and achieve a polished, updated bathroom appearance. If you’re also dealing with issues like toilet seat paint coming off, this is a perfect opportunity to address that as well. For more detailed instructions and tips, Beebuze can be a valuable resource to assist you throughout the process.
Removing The Old Toilet Seat

The first step when replacing a toilet seat is removing the old one. It may sound daunting, but it can be a straightforward process with the right approach. By taking a systematic approach, you can ensure a smooth transition to a new, clean toilet seat. Let’s start by developing a plan of action.
Developing A Plan Of Action
The key to success is having a clear plan. Firstly, gather the necessary tools, such as a wrench and screwdriver. Next, ensure you have a new toilet seat ready for installation. Once you have everything, proceed to the next step: loosening and removing the bolts.
Loosening And Removing The Bolts
To begin, locate the bolts connecting the toilet seat to the bowl. Using a wrench, gradually and carefully loosen the bolts. Once the bolts are loose enough, carefully remove them, ensuring that they do not damage the toilet bowl. With the bolts removed, the next step is cleaning the area.
Cleaning The Area
Now that the old seat has been removed cleaning the area thoroughly is essential. Wipe down the toilet bowl and surrounding areas with a disinfectant to ensure it is clean and residue-free. This will prepare the surface for installing the new toilet seat, providing a hygienic and secure fit. You are ready to install the new toilet seat with the old seat removed and the area cleaned.
Installing The New Toilet Seat
Installing the new toilet seat is a straightforward process that can be quickly completed with the right tools and patience. Follow these simple steps to establish a stable and adequately secure toilet seat properly.
Positioning The New Seat
To begin, position the new toilet seat over the bowl, ensuring the seat’s alignment with the rim and the bolt holes align with the holes in the bowl.
Attaching The Bolts And Tightening Them
Next, insert the bolts through the seat and bowl holes, attaching the nuts underneath. Use a wrench to tighten the nuts securely, but be careful not to over-tighten, as this can damage the seat or bowl.
Ensuring Stability And Alignment
After tightening bolts, check the seat’s stability by gently rocking it back and forth. Ensure the seat is aligned with the bowl and adjust if necessary to achieve a secure fit.
Testing And Final Touches

Once you have installed the new toilet seat and made the necessary adjustments, testing its fit and functionality is time. Testing the seat ensures that it is properly installed and secure, and the final touches ensure everything is in place and visually appealing.
Inspecting For Proper Fit And Functionality
Before considering the job done, inspect the toilet seat for proper fit and functionality. Ensure the seat is aligned correctly with the bowl and sits snugly in place. When pressure is applied, check if the seat moves or wiggles – it should be firmly attached.
If your seat has hinges, ensure they open and close smoothly without obstructions. Test the lid to see if it stays up when lifted, and examine the seat’s surface for any defects or damage. Ensuring the seat is properly fit and functional is crucial for long-term use.
Making Additional Adjustments If Needed
In some cases, you may find the initial adjustments you made during installation insufficient. If the seat is loose, try tightening the bolts or hinges further. Alternatively, consider loosening the connections and readjusting the position if the seat is too tight or does not align properly.
After each adjustment, take the time to test the seat’s stability and alignment. By making these additional adjustments if needed, you can optimize the fit of your toilet seat, ensuring comfort and durability.
Adding Any Finishing Touches
Once you are satisfied with the fit and functionality of the toilet seat, focus on adding the finishing touches. These final touches can enhance both the appearance and usability of the seat.
Start by thoroughly cleaning the toilet seat and the surrounding area to remove any dirt or residue from the installation. This will give the seat a polished and fresh look. Additionally, consider adding decorative elements such as seat covers or cushioning for comfort and style.
It is also a good idea to check if any plastic covers or caps were provided with the seat during the installation. These covers can be used to conceal the bolts and screws, giving the seat a more finished and seamless appearance.
Focusing on these finishing touches can ensure that your newly installed toilet seat functions correctly and enhances the overall aesthetics and cleanliness of your bathroom.
Frequently Asked Questions On How To Replace A Toilet Seat
How Do You Remove A Toilet Seat?
To remove a toilet seat, start by locating the screws or bolts that secure it to the toilet bowl. Use a screwdriver or adjustable wrench to loosen and remove these screws. Once the screws are removed, lift the seat and hinge brackets off the bowl.
Conclusion
To conclude, replacing a toilet seat is a simple task that can quickly be done by following the steps outlined in this guide. Discovering brown water coming out of your faucet and toilet can be a disconcerting experience; however, you can swiftly and successfully address the issue by gathering the necessary tools, preparing the area, removing the old seat, and attaching the new one. Remember, regular maintenance and proper cleaning will ensure the longevity and functionality of your toilet seat. So go ahead and tackle this DIY project with confidence!
Tags: bathroom upgrade, DIY bathroom, DIY tutorial, home improvement, plumbing tips, toilet seat replacement


