Screed is the unsung hero of the construction world. This is because it offers a wide range of benefits to buildings that many people don’t even consider. More and more people are starting to request the application of screed on their floors, but how do you prepare the surfaces first?
Find out everything you need in this comprehensive guide.
What is screed?
Screed is a mixture that is applied over flooring or other surfaces, such as underfloor heating systems, that ensures a space has a smooth and even finish. The main purpose is to offer a level surface before applying other flooring materials such as tile, carpet, or wood.
There are two main types of screed you can opt for:
Cement screed
This type of screed is a mixture of sand, cement, and water and is often sold and used in a dry form. It’s known for its strength and durability when being used by professionals in flooring projects.
Self-leveling screed
Self-leveling screed is premixed and polymer-modified and, once applied, will flow and settle into a level surface without any manual labor. It is the number one option for installing tiles or working in commercial buildings.
The benefits of a screeded floor
There’s a reason why many professionals apply screed in their flooring projects, and that’s because they come with a wide range of benefits. Some of these benefits include:
Level and smooth floor surface
The last thing you want on your property is to walk up or down hills, so it’s always important to have a layer of screed in place to level out the surface. Alongside this, you’ll be left with extremely smooth floors, making it much easier to install the flooring of your choice, whether carpet or laminate.
Distributes heat evenly and efficiently
A lot of people opt for screeded floors when installing an underfloor heating system. This is because it obviously smooths out the surface of the system, but it also helps distribute heat evenly around the room. It also increases energy efficiency in the building, which will lower your monthly bills.
Added strength and durability
If you’re building a new property, you want it to be as strong as possible. When adding a layer of screed on the floors before adding the material of your choice, you’re ensuring at least the bottom half of the rooms will stand the test of time. This is because the screed is incredibly strong and durable, so you won’t have to worry about repairs.
Layer of sound insulation
Screed plays a crucial role in buildings that have multiple apartments or offices. This is because it adds a layer of sound insulation alongside its many other benefits. With screed in place, it means you don’t have to listen to the noisy disruptions of your upstairs or downstairs neighbors, and you have more privacy yourself too.
How to prepare a floor for screeding
So, you now know all about screed and its importance, but how do you actually prepare your floors and install the screed? You simply have to follow the steps below:
Assess the floor
The first thing to do before applying screed to any flooring, whether it’s newly built or old, is to assess it. This means inspecting the substrate for any cracks or damage and identifying the type of flooring that is already in place. Once you know what flooring is in place, you need to measure the thickness of it.
Prepare the substrate
Once you have all the information you need about the floors, it’s time to get the substrate ready. This involves cleaning the surface and removing any dust and debris. You should also stript the floor of any adhesives or paints. If there is any damage to the floors, you should repair them by filling in cracks and trying to smooth out uneven surfaces.
Ensure proper bonding
You now need to prime the surface of the floor to enhance the bonding of the screed when it’s applied. Choose a primer that is suitable and works best with the substrate. You can increase the chances of proper bonding on your floors by applying a bonding agent alongside the primer, as this will enhance the adhesion of the screed.
Establish a level base
Before you start applying the screed, you must establish a level base. Set up guides at the level you want (from when you took measurements) across your floor’s surface. You want to ensure all the guides are uniform at different points in the room. As an option, you can also apply self-leveling compounds to your floor before the screed.
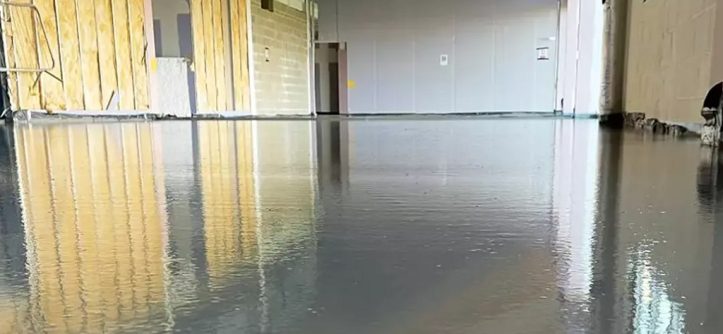
Mix and apply screed
It’s now time to add the screed. Ensure you choose the right screed mix for you. If you’re choosing cement screed, ensure you are using the right proportions of sand, cement, and water when mixing it. Ensure the consistency is suitable for installation, and then pour and spread the mixture evenly across the floor. Use a straightedge to level the screed to your desired thickness.
Cure and dry screed
Once the screed has been applied, you need to ensure you go through a proper curing and drying process. This will prevent the opportunities for cracks to develop. Follow the right curing procedure based on the screed you used, and give an adequate amount of time for your screed to dry before you do anything more to the floor.
Final checks
When the screed is dry, you just need to conduct a few final checks to see if everything is up to scratch. Look for any imperfections, issues, or damage. If everything is fine, you can move on with your project.
Final thoughts
While preparing your own floors and applying screed yourself may seem like a cost-effective idea, you need to ensure you have the right know-how before getting started. If you don’t want to use a professional, we recommend at least consulting with one to reduce the chances of errors and ensure a seamless result.