Cracks in your shower floor can be a frustrating and unsightly problem. Not only do they detract from the aesthetic of your bathroom, but they can also lead to leaks, water damage, and mold growth if left unaddressed. Fortunately, fixing a crack in the shower floor is a manageable DIY project for most homeowners with the right tools, materials, and guidance. In this comprehensive guide, we’ll walk you through the process of repairing a cracked shower floor, from assessing the damage to applying the final finish. By the end, you’ll have a fully restored, watertight shower floor that looks as good as new.
Why Do Shower Floors Crack?
Before diving into the repair process, it’s helpful to understand why shower floors crack. Common causes include:
- Structural Movement: Shifting foundations or settling homes can create stress on the shower base, leading to cracks.
- Wear and Tear: Over time, constant exposure to water, soap, and weight can weaken materials like acrylic, fiberglass, or tile.
- Improper Installation: If the shower pan wasn’t properly supported or installed, it may crack under pressure.
- Impact Damage: Dropping heavy objects, like a shampoo bottle, can cause cracks in brittle materials.
Identifying the cause can help you prevent future cracks, but for now, let’s focus on fixing the existing damage.
Tools and Materials You’ll Need
To repair a crack in your shower floor, gather the following tools and materials:
- Safety Gear: Gloves, safety glasses, and a dust mask
- Cleaning Supplies: Mild detergent, sponge, and a scrub brush
- Sandpaper: Medium-grit (120-150) and fine-grit (220-300)
- Utility Knife or Putty Knife: For removing loose debris
- Epoxy or Fiberglass Repair Kit: Specific to your shower material (acrylic, fiberglass, or composite)
- Waterproof Sealant: Silicone-based or polyurethane sealant
- Painter’s Tape: To protect surrounding areas
- Clean Cloths: For wiping down surfaces
- Paintbrush or Foam Roller: For applying repair compounds
- Optional: Matching paint or gel coat for aesthetic finishing
- Drill (Optional): With a small bit for stress-relief holes
Step-by-Step Guide to Fixing a Crack in the Shower Floor
Follow these steps to repair your cracked shower floor effectively. This process works for most common shower materials, including fiberglass, acrylic, and composite bases. For tiled showers, additional steps may be required to replace grout or tiles.
Step 1: Assess the Damage
Start by examining the crack closely. Is it a hairline crack, or is it wide and deep? Does it extend through the entire shower base, potentially causing leaks? Small, surface-level cracks are easier to fix, while larger ones may require professional help or even a full shower pan replacement. If the crack is wider than 1/4 inch or you notice water pooling beneath the shower, consult a professional to assess structural damage.
Step 2: Clean the Area
A clean surface is critical for a strong repair. Follow these steps:
- Remove any soap, grime, or debris from the shower floor using a mild detergent and sponge.
- Scrub the area around the crack with a scrub brush to remove dirt and oils.
- Rinse thoroughly with clean water and dry the area completely with a clean cloth.
- For best results, let the shower floor air-dry for 1-2 hours to ensure no moisture remains.
Step 3: Prepare the Crack
To ensure the repair compound adheres properly, you’ll need to prep the crack:
- Use a utility knife or putty knife to remove any loose or chipped material around the crack.
- If the crack is hairline, gently widen it slightly (to about 1/8 inch) with the utility knife to allow the repair compound to penetrate.
- Sand the area around the crack with medium-grit sandpaper (120-150 grit) to create a rough surface for better adhesion.
- Optional: For longer cracks, drill small “stress-relief” holes (1/8 inch) at each end of the crack to prevent it from spreading further.
- Wipe away dust and debris with a clean, dry cloth.
Step 4: Protect Surrounding Areas
Use painter’s tape to mask off the area around the crack, leaving about an inch of space on either side. This protects the rest of the shower floor from repair compounds and ensures a clean finish.
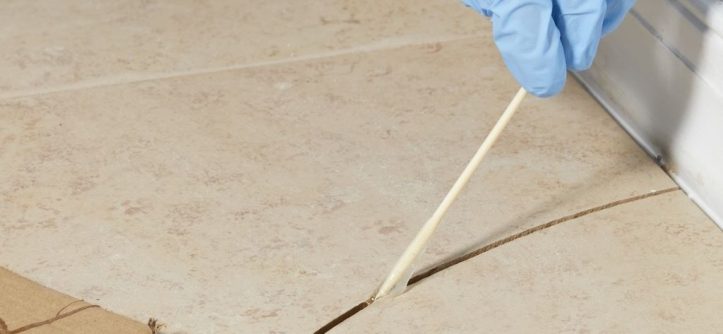
Step 5: Apply the Repair Compound
The type of repair compound depends on your shower floor material. Most hardware stores sell epoxy or fiberglass repair kits tailored to acrylic, fiberglass, or composite surfaces. Follow these steps:
- Read the instructions on your repair kit carefully.
- Mix the epoxy or fiberglass resin according to the manufacturer’s directions. Most kits include a hardener and resin that you’ll combine in a specific ratio.
- Apply the mixture to the crack using a putty knife or a small paintbrush, pressing it into the crack to fill it completely.
- Smooth the surface with the putty knife to remove excess compound and create a level finish.
- Allow the compound to cure as per the instructions—typically 24-48 hours. Avoid using the shower during this time.
Step 6: Sand and Smooth the Repair
Once the repair compound has cured:
- Sand the area with fine-grit sandpaper (220-300 grit) to smooth the surface and blend it with the surrounding shower floor.
- Wipe away dust with a clean, damp cloth and let the area dry.
Step 7: Apply a Waterproof Sealant
To prevent water from seeping into the repaired area:
- Choose a silicone-based or polyurethane waterproof sealant compatible with your shower material.
- Apply a thin, even layer over the repaired area using a paintbrush or foam roller.
- Let the sealant dry fully—usually 24 hours—before proceeding.
Step 8: Optional – Finish for Aesthetics
If the repaired area doesn’t match the color or finish of your shower floor:
- Purchase a gel coat or paint designed for shower surfaces, available at hardware stores or online.
- Match the color as closely as possible to your shower floor.
- Apply the gel coat or paint with a small brush or foam roller in thin, even layers.
- Allow each layer to dry (usually 2-4 hours) before applying another, if needed.
- Once satisfied with the finish, let it cure for 24-48 hours.
Step 9: Test the Repair
After all layers have cured:
- Remove the painter’s tape carefully.
- Run water over the repaired area to check for leaks or weak spots.
- If you notice any issues, repeat the repair process or consult a professional.
Tips for Preventing Future Cracks
- Reinforce the Base: Ensure your shower pan is properly supported underneath. Add additional support with plywood or a mortar bed if needed.
- Avoid Heavy Impacts: Be cautious with heavy objects in the shower to prevent accidental damage.
- Regular Maintenance: Clean your shower regularly and inspect for small cracks or wear to catch issues early.
- Use a Shower Mat: A non-slip mat can reduce stress on the shower floor and protect it from wear.
When to Call a Professional
While small cracks are DIY-friendly, some situations require expert help:
- Cracks wider than 1/4 inch or extending through the entire shower base
- Signs of significant water damage or leaks beneath the shower
- Structural issues with the floor or foundation
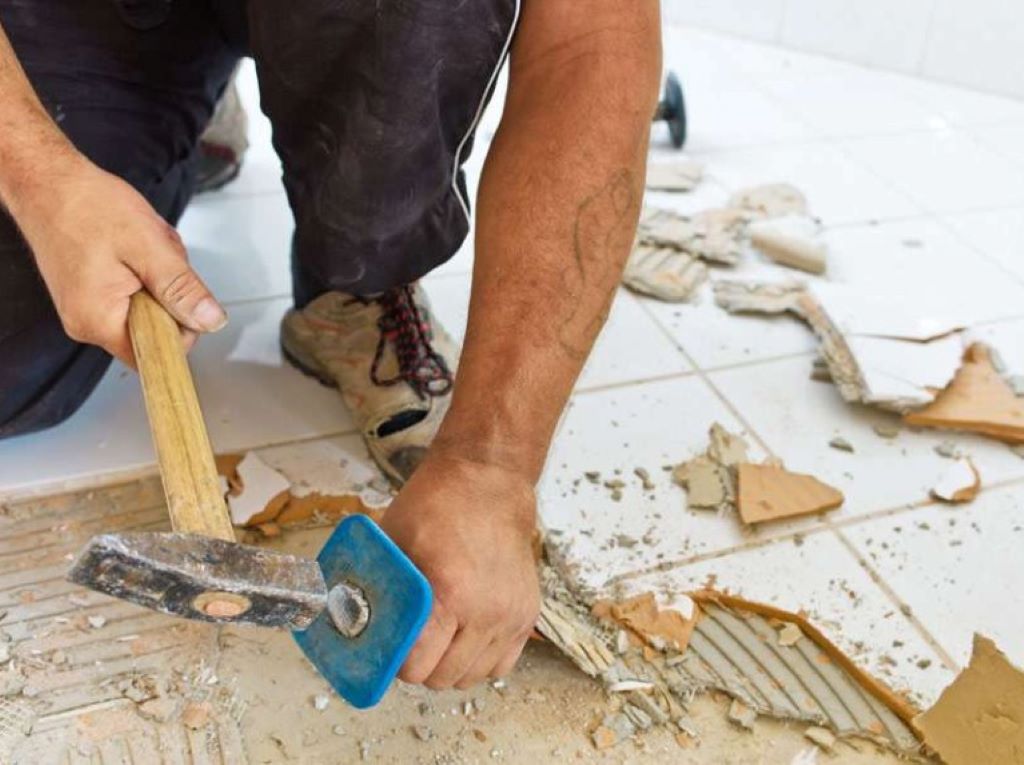
- Cracks in tiled showers that involve extensive tile or grout replacement
A professional plumber or contractor can assess the damage and recommend the best solution, which may include replacing the entire shower pan.
Conclusion
Fixing a crack in your shower floor is a rewarding DIY project that can save you money and prevent further damage to your bathroom. By following this step-by-step guide, you can repair cracks in fiberglass, acrylic, or composite shower floors with confidence. With the right tools, materials, and a little patience, your shower will be watertight and looking great in no time. Remember to address cracks promptly to avoid leaks, mold, and costly repairs down the line. Now, roll up your sleeves and get started on restoring your shower to its former glory!
Read More: