Acrylic is a popular choice for home improvement projects such as shower pans, wall cladding, and countertops. However, acrylic is also a tough material to work with. One of the difficult aspects of working with acrylic design is tiling over the surface. If you’re considering tiling over your acrylic shower pan, then this blog article will provide you with helpful tips that can help make your tiling project much easier!
How to Tile Over Acrylic Shower Pan
If you’re like most homeowners, you probably have a shower pan that’s made of acrylic. Acrylic is a popular material for shower pans because it’s tough, easy to clean, and doesn’t corrode. But if you want to replace your acrylic shower pan with a tile one, there are a few things you need to know first.
Step One: Prep the Surface
Before you start tiling over your acrylic shower pan, you need to prepare the surface. You need to roughen up the surface so that the tiles will grip better. You can do this by using a grater or a coarse sandpaper. Make sure that the surface is completely smooth before you start tiling.
Step Two: Choose Your Tile Size and Style
When choosing your tile size, make sure that the tiles are big enough to cover the entire surface of your acrylic shower pan. You can choose between traditional tiles or porcelain tiles. Porcelain tiles are less likely to stain or wear down over time, but they also cost more than traditional tiles. If space is an issue, consider opting for traditional tiles instead.
Can you tile over acrylic shower pan?
Yes, you can tile over acrylic shower pan. Acrylic shower pans are very durable and can withstand a lot of wear and tear, but like any other shower pan, they can be damaged by water leakages. If your acrylic shower pan is leaking water onto the floor, you may want to consider tiling it over.
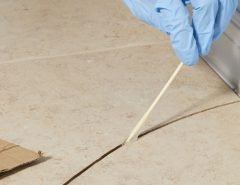
There are a few things you need to keep in mind when tiling over an acrylic shower pan. The first is that the tiles should be level with each other so that the water flow is uniform. You will also want to make sure that the tile adhesive is compatible with the acrylic shower pan. Lastly, make sure that you seal all the seams and corners of the acrylic shower pan before tiling it over.
Pros and Cons of Tiling Over Acrylic Shower Pan
When it comes to installing tile over an acrylic shower pan, there are pros and cons to consider.
The big pro of tiling over an acrylic shower pan is that it can be a much cheaper option than replacing the entire shower enclosure. If you’re only concerned about looks, tiling might be a better option than hiring a contractor to install a new shower. Another pro of tiling is that it can be easier to do than replacing the acrylic.
However, there are also some cons to consider when tiling over an acrylic shower pan: first, if the pan isn’t level, the tiles will not look uniform. Second, if water leaks under the tiles or through them, they can become damaged. Finally, if the shower area is wet constantly, tiles over an acrylic shower pan can become moldy and must be replaced sooner than if they were installed over concrete or tile.
Problems that can arise during tiling over acrylic shower pan
Tile over acrylic shower pan is a popular way to update your bathroom. However, there are a few things to keep in mind before you start. Here are three of the most common problems:
1) Acrylic shower pans can break if the tiles are not installed properly. Make sure you have an experienced contractor install the tiles for you.
2) If water leaks through the seams between the tiles, they will not be watertight and may start to rot. Seal any open seams with caulk or tile adhesive.
3) If the acrylic shower pan is too small, water will pool on the floor and around the edges of the pan. To prevent this, make sure to measure your existing shower enclosure before you begin tiling.
Conclusion
If you’re looking to tile over an acrylic shower pan, there are a few things you’ll need to do first. Prep your area by cleaning it thoroughly with soap and water—this will help remove any oils or residues from the manufactured surface. Next, use a layer of silicone sealant around the entire perimeter of your shower pan. This will create a barrier against moisture and prevent the mortar from adhering to the manufactured surface. After that, start layering up tiles in accordance with the dimensions of your shower pan. Be sure to account for seams and cracks in the acrylic; these will need to be filled in before laying down additional tiles. When you’re finished, use a trowel or spade to smooth out any bumps or inconsistencies in your finish.