

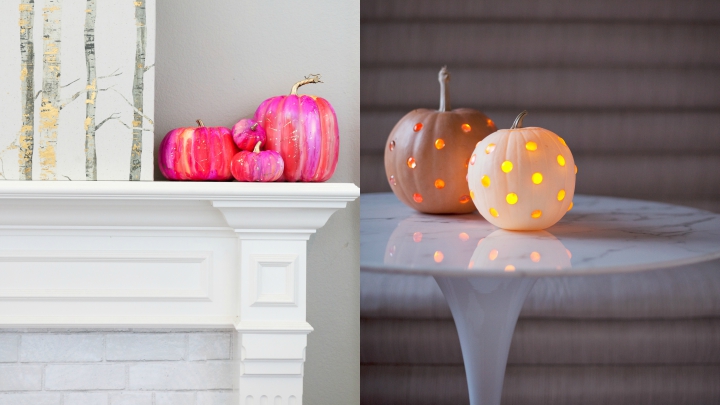
We are in the autumn and very close to the celebration of Halloween. The pumpkins are the symbol of both things and, for that reason, I want to show you two very nice and decorative crafts for this time of the year. The ideas and photos are from the blog A Beautiful Mess, simple and very effective DIY to fill your house with color and joy. Autumn is the season of oranges, ocher and earth tones, but it is also possible to add touches in more vivid tones. You’ll see how good it is. Do you want to check it? We get down to work!
First DIY: Pumpkins full of color
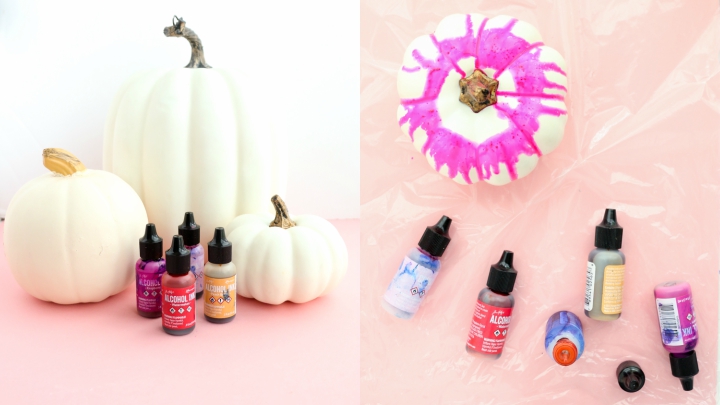
We started with the first proposal, which consists of painting some colorful pumpkins. You will need the following materials to make them …
- Some white pumpkins.
- Alcohol inks. In this case they have used colors in shades raspberry, pink, peach, golden …
- Bottle with alcohol (with sprayer is more comfortable).
- A plastic to protect the work area (the paint drips a lot).
- Some gloves (so as not to get your hands dirty).
Step by Step
The first thing you will do is sprinkle the pumpkin (placed on the plastic) with alcohol. Then, you can drop the alcohol inks on it to cover the entire surface of different colors. As you can see, when all are mixed there is no margin for error, because you can always place layers on top to make beautiful effects.
The choice of colors
The ink will flow where there is alcohol, if you see that there is still some white area spray again with alcohol and add the color. With the golden paint paint the stem and add small splashes if you feel like it. You can play with the tonalities that you like most to decorate your house in a very fun and cheerful way. They are very good if you use the same range of tones. When they dry they blend perfectly and the pumpkin itself absorbs the paint, giving a very bright and decorative result.
You may also like to read: Ideas for decorating the basement at Christmas
Second DIY: Light pumpkin
The second craft consists of making decorative light pumpkins. In this case you will need:
- Pumpkins. This time, from the real ones.
- Glass stones or marbles.
- A drill with a drill of the size of the chosen gems or marbles (you must first have the stones to know how you have to make the hole).
- One LED candle to place inside the pumpkin.
How to make your pumpkins
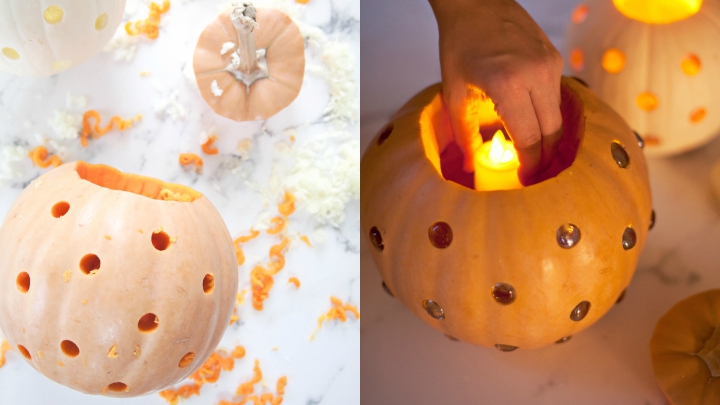
The first thing we will do is remove the “gut” to the pumpkin. Open it up and take out everything you can. With a marker you can mark where to make the holes to have a previous guide. Avoid being too close together.
The holes
Next, use the drill to pierce the pumpkin. Remove the remains that may remain so that the holes are as clean as possible. Place the stones or marbles in the holes you have left. It is important that these are large enough to fit well but not so large that they are loose and can come off.
Lights
Then, introduce an LED lamp inside. It can be in candle format, for example, to replace the top of the pumpkin and add a more decorative, or normal and leave it hidden by putting the lid of the pumpkin. You can even put a regular candle, but you should pay more attention in that case … To avoid accidents or complications, the LED will be a good choice.
The result, as you see, is a pumpkin that shines in a very original way and that you can place in any corner of the house to provide a soft and pleasant lighting to the room.


Leave a Reply
You must be logged in to post a comment.