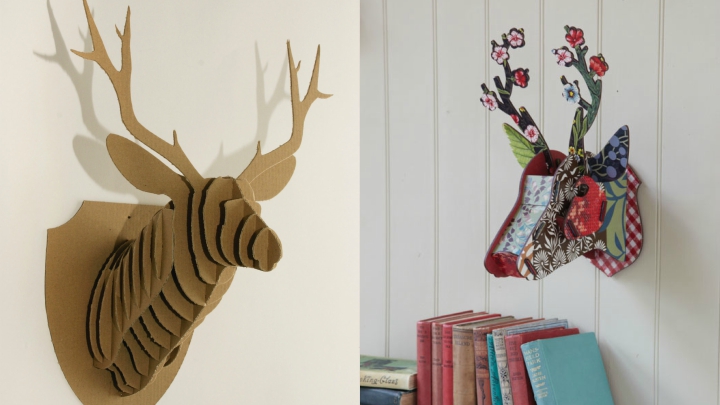
The other day we saw some ideas for decorating with animals and one of them was to hang on the wall heads reindeer, deer or some other animal. You can find them in stores decoration and materials such as cardboard or fabric, among others, but today we will see how you can create with your own hands by two tutorials that I will teach you and to help you dress up your wall with a Nordic touch special.

Paper Deer Head
We started with a first extracted DIY blog Chronicle Books with which you can make a pretty and decorative deer head. For this you need the templates you’ll find this website and the following materials.
- A foam sheet of 50 × 76 centimeters (the measurements of the blog are in inches, I’ve done a conversion to be as close as possible).
- Another piece of foam 15 × 17 centimeters.
- Packing paper of 152 centimeters in length and 76 in width.
- Stamped paper (for scrap for example) of 40 × 17 centimeters.
- A cutting board.
- Adhesive spray.
- A wire to hang the head.
- A punch.
Make the pieces
The first thing you have to do are the parts of the head, helping the templates. From the first sheet of foam we will remove two heads, a body and a nose, and the second smaller a plate for the assembly. Then spray the adhesive spray on each side of the nose piece and glue the wrapping paper. Repeat this process to cover the sides of the head, body and parts of deer horns. Then glue the stamped paper on each side of the pieces.

Hang head
In each piece make a hole under the top edge and also in the piece that comes into contact with the wall. Assemble the pieces joining them through the openings that exist in the templates and thread the cable through these holes, several times, to finish wrapping the wire about itself and make a sort of hanger with which to hang on your wall. The cord may be securely fastened securely. You can use this same technique to make it with a thick cardboard, and leave it the natural color of this material, without lining it.
You may also like to read another article on houseilove: Coasters tropical print
Cardboard reindeer for a Christmas decoration
Now I want to show another DIY to make an ornament with a style Christmas. It is a cardboard reindeer that will not take you much work to do. For this you will need a pencil, a cutter, ruler, gray cardboard, white glue, glitter and a string.
The craft, step by step
First draw the silhouette of the reindeer on the cardboard. You can invent it or if you find it easier to use a template. Then cut with the cutter the outline you’ve drawn. This you have to do twice. You can use the first cut as a guide to draw the second and you are equal. The carton used here is 3 mm thick.

The glitter to decorate the adornment
This year the glitter is more fashionable than ever, and looks great on the Christmas decoration. Put white glue on the two cartons, which are evenly covered. Next put glitter, while it is still wet, spreading it gently. Let it dry.
Hang the reindeer
In one piece make a cut from the center up, as dividing the reindeer into two parts, and in the other do it upside down, from the center down. Connects the two pieces and holds the horns rope to hang your ornament on the roof, for example. If you do smaller ball also it serves you for the Christmas tree.
Tags: Animal Heads, Decorate The Walls


Leave a Reply
You must be logged in to post a comment.