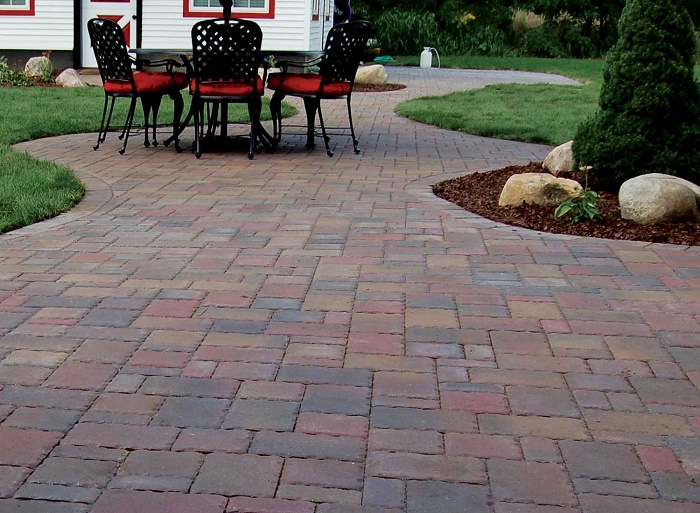
Do you want a paved floor but don’t know how to lay cobblestone pavers? We explain how to do it step by step. Cobblestone pavers are one of the most beautiful options if you want to pave terraces, gardens, entrances, roads, or even parking lots.
How to place cobblestone pavers?
To begin, place pavers mark the contour of the land you want to pave. The depth of the excavation will depend on whether the area has been a paved terrain, or if it will fulfill this function for the first time. If this is the first time, you must dig the soil up to 15-20 cm deep as you will need to create a firm layer and a leveling of the previous ground.

Create a base layer
There is already a base layer, or also called a firm layer, you can jump to the next step for placing pavers, leveling. If you still do not have a firm layer, you can use a mixed granulate base or stabilized the soil. Stabilized earth is a slightly wet mixture of soil and cement. Apply a base 20 to 30 cm thick of this mixture. Spread it homogeneously and then compact it with a manual roller. Keep in mind in this process that the terrain should have a slight slope so that the water can flow in case of rain. It is recommended to make a 2% slope, which implies at least a height difference of 1 to 2 cm per meter to be paved. Read on the last steps to know how to place pavers!
Leveling
The next step for the placement of pavers is to level the ground. This will be done with a layer of fine sand, about 5cm thick. Consider and keep the slope made in the base layer. To level this layer, place two wooden slats of the same height on the ground and with the help of a leveling ruler, make zig-zag movements and distribute the sand that is evenly between the slats. The leveling ruler will drag the excess sand and make the leveling layer smooth. Remove the slats and fill the grooves left with sand to the same height. You can start laying the cobblestones and be careful not to step on the newly paved ground.
You may also like: how to make wood floors less slippery
Paving
Place the first row of cobblestones. With the help of a rubber hammer, insert the pavers into the leveling layer. Because the cobblestones have differences in heights, insert them so they are all at the same height. You must place them contiguously and as close together as so they are not crooked. When you have finished placing them, you must install edges, such as stone curbs, to provide them with stability. To compact the pavers correctly, use a manual roller with a rubber base to avoid damaging them. You can also separate the pavers with the rest of the elements with the Multi-Edge Flex, which is almost invisible after installation.
Basic steps to place cobblestone pavers
Here are the basic steps to place cobblestone pavers correctly.

-
Evaluation of the materials delivered
The product delivered must be checked against the order placed: check the format, color, surface finish and quantity. In case of delay, a verification must be requested with the contractor/supplier before installation.
-
Cross slope
When planning the pavement section, a minimum transverse slope of 2% and 4% will be required on water sensitive soils. It is pending will be prepared from the execution of the subbase.
-
Perimeter confinement
Surfaces constructed with concrete pavers generally need to delimit the contour of the construction with a stable curb to prevent horizontal displacements. It is advisable to specify the distances according to the width of the product to speed up the work. For the confinement of the cobbled surface, you can use curbs installed with a concrete-based foundation appropriate to the height that the surface requires.
-
Baselayer
It must be resistant to deformation (and sufficiently permeable to water). Water flooding should not be in any way above a base layer. It must have a specific thickness according to the traffic loads and the type of existing esplanade. It must be flat and supportive. The frost protection layer must also be part of the base layer.
-
Settling bed
It should have a uniform thickness, which is 4 cm +/- 1 cm. Preferably a mixture of sand and gravel with a grain size of 0/5 and 0/8 mm. It must be uniform throughout its surface. We cannot use it to compensate for the irregularities of the base layer.
-
Mix
Always place the cobblestones mixed with three different pallets. In this way, appreciable large-scale differences in surface color are avoided.
-
Installation
The pavers must be placed in the planned arrangement and with sufficient joint width (at least 3-5 mm). The final pieces in contact with the confinement perimeter should not be smaller than half of the normal pieces and should have the smallest possible live edge. The piece cuts must be made with a water saw and with personal protection (gloves and mask). It is advisable to clean the dirt as soon as possible to keep the surface clean.
-
Grouting
For grouting, we should apply clean sand without clays. We must introduce the grouting material with a broom. The material must be stable to filtration towards the bed and with the particle size to the width of the joint, the aggregate of the thickest will never be greater than the width of the joint.
-
Vibrated
I should choose the appropriate vibrating machine to depend on the format of the cobblestone pavers and should have a rubber base so as not to damage the edges of the pavers. The vibrating procedure must be carried out with the dry surface and before it is used. Before equalizing, the joints must be filled and the floor must be adequately cleaned and dry. If the joint is empty, we should repeat the grouting and vibrating process until this does not occur.
-
Cleaning
Once the surface installation has been carried out, it must be cleaned with a sweep, preferably with the dry surface.
The last step in placing cobblestone pavers is to fill their joints. For this, you can use small boulders or sand. Place the sand on the cobblestones and with the help of a broom, distribute it over the joints until they are filled.
Tags: cobblestone pavers


Leave a Reply
You must be logged in to post a comment.