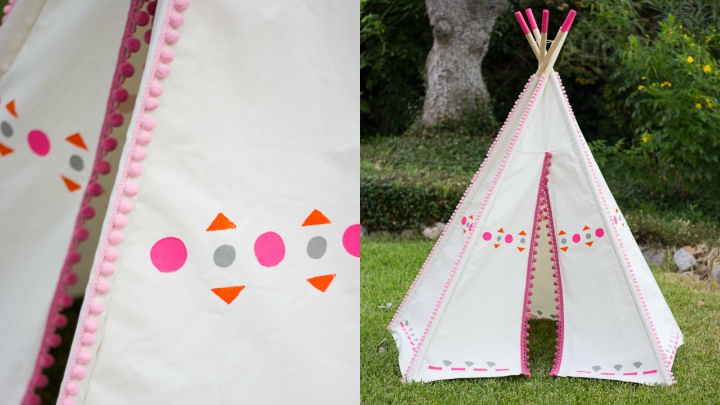
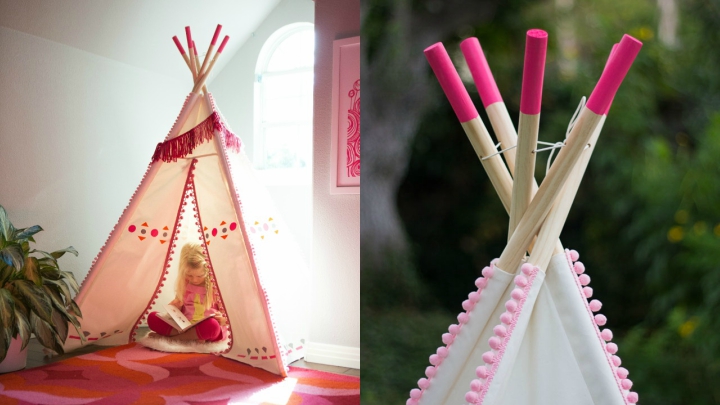
I love the decorative touch so special that gives an Indian tipi to the room of the smallest of the house. Even in any other even if there are no children … For them it becomes a place to play, hide and live a lot of adventures. And for the elderly, in a space with a lot of charm and personality. Today I show you how it has been decorated this Indian tipi through this manual of the blog Design Improvised, which shows us how to be able to adorn this redoubt of fun and intimacy in a simple and very effective.

The materials you will need for your custom tipi
In this case, the author of this DIY has customized a tipi that she bought already made , but if you get up to you can build the structure yourself. But we are going with this idea that it is even easier for you to start.
To do this you will need the following materials …
- An Indian tipi. This one they used is brand Dexton but, as I say, you can do it completely from scratch if you have the time and desire and want to save some money.
- Acrylic paintings.
- Triangular and round sponges.
- Small brushes.
- 30 meters of strip of pompoms.
- Glue gun.

How to decorate this tipi
The first thing you have to do is mount your tipi (or build it). It will be easier to paint if you have it straight, already raised and mounted, because in this way you will see how the pattern of the drawing remains. Then put some paint on a paper plate and stain the circular sponge with it to get a uniform coat of paint. You can test before applying on the fabric to see what amount will be most appropriate for it to be well covered.
You may also like to read another article on houseilove: DIY fabric hammock for your relaxing corner
Draw the pattern
Then you can mark a line with a piece of tape on the tipi to know where you want to draw your picture. And then you can begin to paint the print you have chosen. In this case, it is a border with circles and triangles. The only problem that you will have is that with the tipi of foot you do not have a hard surface against which to press the sponge so that the painting sticks well. To solve it, you can put your hand behind to support it and then with the brush you can fill any gap left if you cannot cover the entire circle with the sponge. In this tutorial, the pattern is made with larger circles in pink, others smaller in gray and orange triangles.

The pompoms and the finishing touch
To finish personalizing this decorative tipi, add the strip of pompoms. Just stick it with the silicone gun, starting at the top of the canvas. The final touch has been achieved by painting the tipi sticks that protrude from above. Put some body tape to not stain the entire stick and only be painted the top, as you see in the photograph. Here they have used the rose because it is the star color of the whole composition. And it looks really nice …
Tags: children's room, Decorating, DIY, Indian tipi


Leave a Reply
You must be logged in to post a comment.